• I want to thank all the members that have upgraded your accounts. I truly appreciate your support of the site monetarily. Supporting the site keeps this site up and running as a lot of work daily goes on behind the scenes. Click to Support Signs101 ...

Question Which material would be best for a work trailer set of decals?

Boudica

Back to "educational purposes"
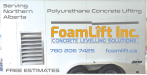
It's a vehicle wrap. Use cast vinyl and lam for it. Whatever your preferred flavor. Our flavor on deck is 3m IJ180 and 8518 lam.

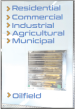
Regarding the design.... Think of this as making a billboard, not a brochure. Most of that content is not necessary. Arrange logo, contact, and a Shorter summary of services to attract attention and state the purpose within about 60 seconds. Use negative space to guide the eye.... Quickly.
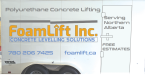
The back can have more... It will be stared at by a couple people in traffic for a while.
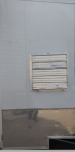
Don't do anything on the front of the trailer, no one will see it, and it Will get trashed from travel... Especially weather travel.
 

Carol Sundberg

New Member
This looks like a cut vinyl job so why bother with printing & laminating? Cut vinyl lasts longer than print. Use a high quality cast vinyl for ease of install & durability. You can offer the option of a "lower grade" calendared vinyl to reduce the price, but labor will still be the same. If they want to go even cheaper, digital print (partial wrap) is the way to go if you feel you can handle the installation.
You definitely need to edit the copy. That's way too much. We use "the rule of 3"... select the 3 most important elements (logo, contact info - 1 phone or a website, and a slogan or tagline), then prioritize them by size & color choice. Often times, on a trailer, we'll add a bulleted list of services, especially if the business name or tagline doesn't clearly indicate what the business does.
Remember, the customer isn't always right. It's your job to educate them & give them the most attractive & professional looking result you can. Of course, if they insist on including everything they listed, try to do it in the most eye-catching way you can. This isn't just advertising your customer's business; it's also showing the world what you can do. You should feel proud of everything that leaves your shop.
Good luck & remember to get a deposit & charge for design!
 

White Haus

Not a Newbie
Thanks very much for the reply,

and for narrowing down my choices. We have some IJ180mc-10 on order along with some 8518 Laminate. We ordered those for some boat decals we're doing so i will let the customer know that the material is on its way instead of using what we already have (The wrong stuff) and i dont think he wants to pay for reflective. I forgot how expensive that stuff is and the customer is a self employed only worker so I doubt he wants that.

The reason i want to avoid using the xr640 for cutting in this instance is that the decals will need to be laminated and i do not know how it would go if i printed, laminated and then put back in the roland xr.640 for cutting. i would need to laminate before cutting ofcourse or the cut outs would be under a layer of solid lam.

He is awaiting my ballpark figure for pricing which i need to send off today. But i havent told him any numbers yet. The customer is a nice guy and is aware that im new to this so im expecting some flexibility. He is however hoping to have this done by early next week which may not be possible depending on the time it takes for the materials to arrive.
Im in a unique spot as my predecessor was fully autonomous in this company and left, then i came in fresh out of design school into this position with nobody with any print knowledge around me, so im learning the basics on my own from the ground up. Still trying to determine what we use the most often and the best materials for certain jobs.

Thanks again

No problem, happy to help another fellow Canadian.

Just a couple of notes regarding your concerns w/ cutting on the Roland - all you have to do is print registration marks out of Versaworks, and select "print only". Laminate your prints, feed them back in the machine (with the front/rectangle registration mark at the front) and go back into Versaworks and select "cut only" then hit "print". (Make sure you test your weight/settings before you send the job down) Not saying you have to do it this way if you're comfortable with the other workflow, just wanted to point out that it's possible and a pretty smooth/simple workflow to run everything through versaworks and just the one machine. We ran Rolands for 10+ years and at the end moved to a Onyx workflow which allowed us to cut Roland jobs on any number of our Summa plotters. It's nice to have the flexibility, and a true tangential plotter will always cut better than a swivel blade like on the Roland print/cut machines, but the Versaworks/Roland workflow is pretty simple once you have the hang of it.

Regarding the layout, I'll echo what the other members have said - it's far too busy and crammed. One of the first rules is don't give the customer exactly what they ask for, especially when it looks like the initial sketch they provided.
White space is your friend. Don't use too many fonts. Not sure what they teach in design school but there are some simple rules that can be followed that will help you be a better designer when it comes to signs and vehicle graphics.

Here are some good books that can help you on your journey - they're a great reference and have some good content:
(Even if you're not focusing on logo design, there are a lot of real world examples in the logo design books and all relate to actual sign and vehicle graphics. Mastering Layout is old but still covers the basic rules of sign design that still apply today)


If you want to get inspired....check out Dan Antonelli / Kickcharge's work here: https://www.kickcharge.com/portfolio/truck-wraps-and-fleet-branding/
**Note** Use for inspiration only. Legally and morally these designs should not be reproduced or imitated.

Hope that helps.
 

White Haus

Not a Newbie
Here's my 5 minute take on the design. Not pretty or polished by any means but meant more to show how much coverage I would aim for.

Customer might put up a fight but I'd lose at least 50% of the random thoughts that he wants to have on there. It's a billboard, not a short story.
 

Attachments

  • Foamlift.jpg
    2.1 MB · Views: 33

ikarasu

Active Member
I agree, the design isn't great but its closely based on the customers pencil ideas. I'm mostly concerned with the logistics of material choice at the moment and price estimation. Thankyou for the head start on that. And the outlines are going to be removed as well as the fonts changed. Unfortunately the colors have to match his existing logo which is the grey and orange logo on the sides.
This is what he sent me to work with.
He's trying to get bang for his buck ofcourse but should i just tell him that the design is too text heavy? Worth mentioning this is my first real customer.
As bad as it sounds...you have to learn how to manipulate your customer. In the end, you give them what you want... but They arent the professional here.

Ask him to spend the day looking at other peoples vehicles - See if he can find one that has as much information on it as his does... And in the rare case that he can, then ask him how much of that vehicle he ended up reading while at the red light before it turned green.

Quote his version really high, offer a dumbed down version like white Haus's - Show him how much better it looks... And explain to him how it uses half the vinyl, half the labour in prep work / install... And costs half the price of his version.


As for Material... For this vehicle I'd use 180. MAYBE Ij40 if there are no rivets or curves and its all going on a flat surface and the customer is on a budget..


Now onto the install. I'm hoping you have an installer? Or are you planning on doing it yourself? If you go with your design and you're trying to align and get like 20 panels of cut text level, and its your first install... you're not going to have a fun time. I'd personally be more worried about the install than the design / print aspect of it.


Looking at it again... Are you going over the silver vent? Or is that grey square by elevate supposed to symbolize the vent? in which case I think your scaling might be quite a bit off


1713272269025.png


1713272232081.png
 

Attachments

  • 1713272221817.png
    1713272221817.png
    719 KB · Views: 15

bob

It's better to have two hands than one glove.
Thanks! Thats a great idea for making sure everything will fit. I will get those photos and try it your way. I dont think anything is reflective at the moment. The reflective material i mentioned earlier was just what we have on hand thats vehicle grade, but after White Haus's input i will not be using that stuff.
When you take these photos tape a 16x24 framing square on the trailer. It can be most anywhere in the shot but closest to the center is best and square to the trailer is a must. Do this for each side as well as the front, and back. Shoot each side as straight on as you can. When you import these photos into AI or whatever, draw a rectangle around the framing square in the image. Do whatever it takes to make that rectangle fit the framing square and closely as you can. Then map the photo into that rectangle [note that I say 'rectangle' but I mean whatever four sided object you ended up with that fits the framing square in that image]. With the photo mapped into the rectangle, make that object a 16x24 rectangle. Unmap the photo and you should have a full scale straight on image. Doing this eliminates any need to actually measure anything since the image is now 1:1 with the actual thing itself. I've been using this technique for decades and it's never been off more than 1/8" or so. Likewise I haven't measured anything over that same time period. As fr as using a framing square, you can use any rectangular object of known dimensions, a piece of substrate, paper, anything. The larger the better.
 

DL Signs

Never go against the family
Your revisions are better than his mess... From a marketing standpoint, whatever you can't read in a couple of seconds is wasted. No one gets the time to look at everything unless it's parked and they're walking by. For print ads in newspapers, buyers and shopper guides, flyers & handouts, go nuts, but people pass by signs and vehicles quick, they only have seconds to wrap their minds around what they're looking at, so you want the basics. Logo, company name, simple basic description of what they do (if actually needed), and contact is the optimum. If someone wants to learn more about a company, that's what the internet and phones are for. Since you're new at this, whenever you're driving around, look at signs and vehicle graphics, see how much you can take in from different ones as you pass them by. Look at color contrasting that makes things pop, or not, types of fonts that are most/ least legible. In the sign world, this knowledge is part of the game, and determine whether your layouts and designs will work, or not, and what to recommend to customers for the greatest impact. The more info you add, the smaller everything gets, and the less focus there is on their brand.

For flat surfaces, colored sign vinyl is the way I go for trailers if I can, it's extremely durable, more economical to sell, but a little tricky to work with over rivets. If you're really green, you may be better off printing and using a conformable cast vinyl if it has a lot of rivets in the path (like the IJ180, or comparable from other brands). It's going to be more costly, but installing will be easier with a conformable vinyl than colored sign vinyl. Unless you're comfortable with it anyway. If you have a trailer at your disposal, or anything with rivets, and some scraps of vinyl, experiment first.
 

newprinterguy

New Member
How did you get into this? This is like buying an airplane with no pilot's license.
Im 28 and graduated from AUarts in spring 2023 with a degree in design and illustration. I moved back in with my parents after school, couldnt find a job in my field for 9 or 10 months (applied to over 100 entry level jobs) and was working a janitorial gig until i found something.
I lucked out, there was a manufacturing/watersports company nearby (In this small town of 4000 people) that desperately needed a designer/print shop operator, as they had a boat show coming up and had no promo materials printed. their previous graphics and print guy up and left and nobody else in the company had any idea about anything in the print shop. I had a very small amount of experience and took 1 month of a print class while in school so i could kinda sound like i knew a thing or two in the interview.
I got the job and became a department of 1 handling graphic design, any promo materials, flyers and decals needed with relative autonomy.
I had no idea what vinyl was or anything starting out, or anything about large scale printing. So the first few weeks were self guided intense study of the industry and materials we had in stock and their applications. I doggy paddled my way through the boat show stuff and produced some convincing work. I still feel like a fish out of water every single day. But im learning a lot and luckily discovered this website, which has since become my most important resource.

Im confident in my ability to learn and to get this done, regardless of what anyone thinks. I had a discussion with the customer and got a bunch of the text dropped, but he's adamant about keeping what's here in the pics.
 

Attachments

  • pic1.PNG
    pic1.PNG
    524.3 KB · Views: 19
  • pic2.PNG
    pic2.PNG
    399.2 KB · Views: 17
  • pic3.PNG
    pic3.PNG
    230.7 KB · Views: 17
  • pic4.PNG
    pic4.PNG
    139.7 KB · Views: 14
  • pic5.PNG
    pic5.PNG
    104.7 KB · Views: 19
Last edited:

newprinterguy

New Member
As bad as it sounds...you have to learn how to manipulate your customer. In the end, you give them what you want... but They arent the professional here.

Ask him to spend the day looking at other peoples vehicles - See if he can find one that has as much information on it as his does... And in the rare case that he can, then ask him how much of that vehicle he ended up reading while at the red light before it turned green.

Quote his version really high, offer a dumbed down version like white Haus's - Show him how much better it looks... And explain to him how it uses half the vinyl, half the labour in prep work / install... And costs half the price of his version.


As for Material... For this vehicle I'd use 180. MAYBE Ij40 if there are no rivets or curves and its all going on a flat surface and the customer is on a budget..


Now onto the install. I'm hoping you have an installer? Or are you planning on doing it yourself? If you go with your design and you're trying to align and get like 20 panels of cut text level, and its your first install... you're not going to have a fun time. I'd personally be more worried about the install than the design / print aspect of it.


Looking at it again... Are you going over the silver vent? Or is that grey square by elevate supposed to symbolize the vent? in which case I think your scaling might be quite a bit off


View attachment 170874

View attachment 170873
I will have help with the install luckily, the rest is up to me however. I took someone's advice here and superimposed the decals on photos of the trailer. unfortunately they were photos the owner sent to me and weren't great quality. But they were better than trying to make a template in AI from scratch. The sizing was definitely off for most parts of the trailer. that was a bad way to start this project.
 

newprinterguy

New Member
When you take these photos tape a 16x24 framing square on the trailer. It can be most anywhere in the shot but closest to the center is best and square to the trailer is a must. Do this for each side as well as the front, and back. Shoot each side as straight on as you can. When you import these photos into AI or whatever, draw a rectangle around the framing square in the image. Do whatever it takes to make that rectangle fit the framing square and closely as you can. Then map the photo into that rectangle [note that I say 'rectangle' but I mean whatever four sided object you ended up with that fits the framing square in that image]. With the photo mapped into the rectangle, make that object a 16x24 rectangle. Unmap the photo and you should have a full scale straight on image. Doing this eliminates any need to actually measure anything since the image is now 1:1 with the actual thing itself. I've been using this technique for decades and it's never been off more than 1/8" or so. Likewise I haven't measured anything over that same time period. As fr as using a framing square, you can use any rectangular object of known dimensions, a piece of substrate, paper, anything. The larger the better.
That's genius, i will be using that exact technique next time. Thankyou for that time saver.
 

newprinterguy

New Member
We use an Avery 2903 for cheaper flat applications and an over laminate. This is a calendared laminate that works well

For long term and better work Avery 1105 with 1060 laminate. Cast laminate system. Expensive, but awesome
Thanks! that's an invaluable nugget to me.
 

newprinterguy

New Member
No problem, happy to help another fellow Canadian.

Just a couple of notes regarding your concerns w/ cutting on the Roland - all you have to do is print registration marks out of Versaworks, and select "print only". Laminate your prints, feed them back in the machine (with the front/rectangle registration mark at the front) and go back into Versaworks and select "cut only" then hit "print". (Make sure you test your weight/settings before you send the job down) Not saying you have to do it this way if you're comfortable with the other workflow, just wanted to point out that it's possible and a pretty smooth/simple workflow to run everything through versaworks and just the one machine. We ran Rolands for 10+ years and at the end moved to a Onyx workflow which allowed us to cut Roland jobs on any number of our Summa plotters. It's nice to have the flexibility, and a true tangential plotter will always cut better than a swivel blade like on the Roland print/cut machines, but the Versaworks/Roland workflow is pretty simple once you have the hang of it.

Regarding the layout, I'll echo what the other members have said - it's far too busy and crammed. One of the first rules is don't give the customer exactly what they ask for, especially when it looks like the initial sketch they provided.
White space is your friend. Don't use too many fonts. Not sure what they teach in design school but there are some simple rules that can be followed that will help you be a better designer when it comes to signs and vehicle graphics.

Here are some good books that can help you on your journey - they're a great reference and have some good content:
(Even if you're not focusing on logo design, there are a lot of real world examples in the logo design books and all relate to actual sign and vehicle graphics. Mastering Layout is old but still covers the basic rules of sign design that still apply today)


If you want to get inspired....check out Dan Antonelli / Kickcharge's work here: https://www.kickcharge.com/portfolio/truck-wraps-and-fleet-branding/
**Note** Use for inspiration only. Legally and morally these designs should not be reproduced or imitated.

Hope that helps.
Thankyou! i had no idea you could do that with the Roland, i thought once the media came out, the Roland wouldnt recognize it again once fed back through. But that makes sense! I only ever cut and print simultaneously with the Roland.
I will be looking into these books and taking your advice. Thankyou sir.
 

White Haus

Not a Newbie
Thankyou! i had no idea you could do that with the Roland, i thought once the media came out, the Roland wouldnt recognize it again once fed back through. But that makes sense! I only ever cut and print simultaneously with the Roland.
I will be looking into these books and taking your advice. Thankyou sir.

You're welcome. Here's a quick video regarding the workflow:

They're using a newer printer and version of Versaworks, but the steps are the same on older units and version of VW.
 
Top