
RighteousDude
New Member
This is wild to see how complicated ya'll are making this... I didn't realize I was doing something unique the way I do it. Maybe (hopefully) I've misunderstood some of the comments here and my way (which is incredibly fast and easy) is in the comments above...
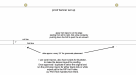
1) print banner with 1" bleed --- we'll be using 1" hem tape the way I do it.
2) flip banner upside down and on the backside of the banner, take your roll of hem tape and hold it so it's lined up with the edge of the banner (thus providing you a solid spot to make a 1" mark, no need to tape measures, the roll is your tape measure)
2.5) make little ballpoint pen marks 1" in from the edge of your banner that you cut to size (with a 1" bleed) roughly every 1' to 3' apart depending on much assistance you need from the marks to pull your tape in a straight line.
3) after you've made your guide marks, just line one edge at a time with hem tape... BUT, and this is where it sounds like a lot of you are complication the process, don't put the tape at the edge of the banner... you're going to set it 1" inside so when you fold over for your hem your folding TO the adhesive instead of WITH the adhesive.
4) as you fold over, don't bother trying to smooth it the whole way... just have a leading hand loosely fold it a bit ahead of your pressing hand and only tack the top edge of it at the top edge of the hem tape (this is where I feel like my description will fall short and I hope I remember to follow with a video of this)
5) once you have it folded over loosely so the edge of the banner is folder to the far edge of the hem tape, just follow through with a squeegee (or a brayer if you don't want to cause a tiny bit of ink damage at the edge of the fold) for pressure.
if my description here isn't easy to follow... if a few people reply and ask for it I'll video tape my process... I knock out a 4'x8' banner in maybe 10 minutes tops with hem tape and grommets using this method. I haven't actually timed myself, but I'd be pretty surprised if it's even 10 minutes. The whole idea of making your own custom straight edges out of sintra and having to get out your tape measure, that's really not necessary and only serves to slow you down and as we have all learned... time is money (or time spent working is less time relaxing)
1) print banner with 1" bleed --- we'll be using 1" hem tape the way I do it.
2) flip banner upside down and on the backside of the banner, take your roll of hem tape and hold it so it's lined up with the edge of the banner (thus providing you a solid spot to make a 1" mark, no need to tape measures, the roll is your tape measure)
2.5) make little ballpoint pen marks 1" in from the edge of your banner that you cut to size (with a 1" bleed) roughly every 1' to 3' apart depending on much assistance you need from the marks to pull your tape in a straight line.
3) after you've made your guide marks, just line one edge at a time with hem tape... BUT, and this is where it sounds like a lot of you are complication the process, don't put the tape at the edge of the banner... you're going to set it 1" inside so when you fold over for your hem your folding TO the adhesive instead of WITH the adhesive.
4) as you fold over, don't bother trying to smooth it the whole way... just have a leading hand loosely fold it a bit ahead of your pressing hand and only tack the top edge of it at the top edge of the hem tape (this is where I feel like my description will fall short and I hope I remember to follow with a video of this)
5) once you have it folded over loosely so the edge of the banner is folder to the far edge of the hem tape, just follow through with a squeegee (or a brayer if you don't want to cause a tiny bit of ink damage at the edge of the fold) for pressure.
if my description here isn't easy to follow... if a few people reply and ask for it I'll video tape my process... I knock out a 4'x8' banner in maybe 10 minutes tops with hem tape and grommets using this method. I haven't actually timed myself, but I'd be pretty surprised if it's even 10 minutes. The whole idea of making your own custom straight edges out of sintra and having to get out your tape measure, that's really not necessary and only serves to slow you down and as we have all learned... time is money (or time spent working is less time relaxing)