-
I want to thank all the members that have upgraded your accounts. I truly appreciate your support of the site monetarily. Supporting the site keeps this site up and running as a lot of work daily goes on behind the scenes. Click to Support Signs101 ...
You are using an out of date browser. It may not display this or other websites correctly.
You should upgrade or use an alternative browser.
You should upgrade or use an alternative browser.
Falcon 1 Outdoor 48 rebuild - documenting!
- Thread starter chorca
- Start date
chorca
New Member
Your i1 should do both!
Awesome! I'll hold off on buying things for awhile, we'll see what this one can do!
Hmmm.
Do not know if media and ink will differ so much to share profiles but who knows")
Nice PDF for the profiling. Thansk for sharing the link.
I found out that last week at our office we have the COLOR SAVVY CM2C unit which is mentioned in the drop down menu but it works on a serial port. My new PC has no serial port so I bought a serial to USB hub. Hardware says it is com3 but when I set the savvy to com3 in the profiler and click calibrate it say the unit is not connected. :-(
BTW I added the test file I use for the carbon.
I only use Arlon DPF 4560GTX and DPF 8000 media.
Paco
Do not know if media and ink will differ so much to share profiles but who knows
Nice PDF for the profiling. Thansk for sharing the link.
I found out that last week at our office we have the COLOR SAVVY CM2C unit which is mentioned in the drop down menu but it works on a serial port. My new PC has no serial port so I bought a serial to USB hub. Hardware says it is com3 but when I set the savvy to com3 in the profiler and click calibrate it say the unit is not connected. :-(
BTW I added the test file I use for the carbon.
I only use Arlon DPF 4560GTX and DPF 8000 media.
Paco
Attachments
You might want to try to add a serial card to one of your pci ports on your mother board. It would be more direct and mabey it would recognise it.Hmmm.
Do not know if media and ink will differ so much to share profiles but who knows
Nice PDF for the profiling. Thansk for sharing the link.
I found out that last week at our office we have the COLOR SAVVY CM2C unit which is mentioned in the drop down menu but it works on a serial port. My new PC has no serial port so I bought a serial to USB hub. Hardware says it is com3 but when I set the savvy to com3 in the profiler and click calibrate it say the unit is not connected. :-(
BTW I added the test file I use for the carbon.
I only use Arlon DPF 4560GTX and DPF 8000 media.
Paco
Just hooked the color savvy on the PC again and I could calibrate it so there is connection now. 
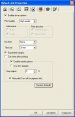
When reading the manual for profiling I stumbled on things that are not mentioned or unclear.
If you are going to print test swatches later should you still use a color profile or.... when you set up a new profile? The pictures in the manual and the text are not clear about that.
I assume if you build a new profile you switch off all things that are related to color profiling and just make a straight out of the printer job?
From there you build the profile further.
What should be unchecked and what checked to do it right?
Paco
Attachments
chorca
New Member
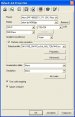
If you are going to print test swatches later should you still use a color profile or.... when you set up a new profile? The pictures in the manual and the text are not clear about that.
I think you need to disable color correction when you go to print the swatches. You'll prolly use the linearization you determined before that, and this all should happen on a new profile, since you're creating one for the media. Disabling color correction will let the instrument see exactly what the printer does normally without being corrected, so that it can generate the proper correction matrix.
After 547 clicks (with some doubles) for calibrating the color swatch I got a new custom profile with inside flexi done. Ran out of black ink so could not test the new profile. :-( One profile is 1 hour work in total, sanning the 547 colored blocks one by one (3 seconds each) is the most time consuming. The slide setup from the DATA PRO spider measurementset is much easier and quicker but that does not work for Flexi
. I got all screenshots, so when time allows I make a better manual for it.
This was in 720x720 dpi. I am curious if quality will be better if I make a 1400x1400 dpi profile.
Paco
. I got all screenshots, so when time allows I make a better manual for it.
This was in 720x720 dpi. I am curious if quality will be better if I make a 1400x1400 dpi profile.
Paco
chorca
New Member
Just wanted to give everyone a heads up, I put up a new post on the blog.
http://falconoutdoor.blogspot.com/2012/02/current-status.html
A lot of the stuff I put up there has been talked about in this thread, but there's a bit of new stuff as well.
Also, I'm working on a full-photo calibration guide for the Falcon Outdoor. It will be on the wiki, and will actually be done with a real printer, so everyone can see what the display says, what the output will be, and what buttons to push to make things happen.
chorca
New Member
Here's a few of the wiki pages I've been editing up. I'm building some icons to use for buttons, and creating illustrations to help out showing how to align the printer.
Calibrate Home
Diag Nozzle Check
Calibrate Flushpoint
Also, I've been having some issues with my black nozzles and deflection. it seems that nearly every nozzle has some sort of deflection issue, and when I first installed the print head, there were none. I've tried soaking the head for a half hour or so with plenty of solvent, cleaning the wiper, pulling ink through the head manually, etc, but I can't get any of the nozzles unstuck. Any ideas?
good stuff, i just bought an rockhopper 48
well just the same as yours i suppose and am in the same rebuilding field here
hoped for an head clean and just make an 12 month service with new pump and cap station and dampners and dump tubes. but
sadly printing was way worse then before when i did all that, think heads are done so need 2 new heads and going to change orings in head pipe->dampner
hope that will help..
maskman
New Member
Thank you for the write up and the blog , I am doing the same thing to a falcon Jr outdoor 38" now.
I have the whole thing rebuilt and I am waiting for the ink to arrive.
On mine , the guy said he ran cleaner through it before storing it for 2 years but when I tried to print , nothing happened. I worked it down to the dampers being clogged ( or what I thought) but when i went to remove the them ( they still had ink in them , HMMM) . they were melted to the head.
Ordered a referb kit from CMYKPARTS and just finished installing them . now waiting for ink