• I want to thank all the members that have upgraded your accounts. I truly appreciate your support of the site monetarily. Supporting the site keeps this site up and running as a lot of work daily goes on behind the scenes. Click to Support Signs101 ...

How to age / weather a new sign...

tulsagraphics

New Member
Hi all!

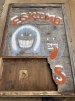
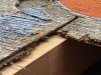
This was a photo from several years ago during a repair job. It's their original sign, hanging and swinging for 50 years, but after getting damaged during that high powered cold front we had yesterday -- it's beyond repair. The client is dead set on having a new sign made that "appears" identical to the old one. The exceptions being: 1 panel instead of 3, and a more visible graphic (although I might weather that a bit too)

What materials / methods would you use to replicate a sign like this?

Side note: The frame isn't that important (right now). We can certainly fabricate a double-sided aluminum pan, interior angle iron reinforcements, etc etc... whatever we need to do to make it a safe / durable installation. In the meantime...

The old sign was hollow and had 3/8" ply on each side, so I was thinking maybe a sheet of 3/8" Cedar plywood (I suspect this would actually be a veneer -- but very pricey and hard to find locally), or perhaps a Douglas Fir? Paint mask for the graphics, prime/paint/etc., then CNC the first 1/16" to rough it up and open the grain for either some heavy duty wire brushing or perhaps a really strong pressure wash using a rotary nozzle (or both?). Oxidize and/or stain all the exposed wood, torch some edges, then seal the piss out of everything.

Maybe something along those lines? Since I've never attempted to create an aged sign before -- I'm open to any/all suggestions. :)

 

Attachments

  • 1773716714977.png
    1773716714977.png
    1.2 MB · Views: 250

John_Smith

Enjoying retirement in Central Florida
What are the "realistic" expectations of the client?
Since this is an outside sign, exposed to all of the elements that Mother Nature will throw at it, you would not want to skrimp on materials.
Be realistic and give the customer what they want. If this is something outside of your skill sets, it is very okay to pass on the job.
Being an accomplished woodworker and knowledgeable painter would help.
 
  • Agree
Reactions: 1 user

John_Smith

Enjoying retirement in Central Florida
Upon closer observation, I am seeing an issue....... the seams of the boards are not going through the image.
Was there an appliqué of some kind that was applied to the boards to give a 3-D effect ??
seams.jpg
 
  • Agree
Reactions: 1 users

John_Smith

Enjoying retirement in Central Florida
Here is more info for the gallery:
Joe's.jpg
images.jpg
 
Last edited:
  • I Appreciate You
  • Agree
Reactions: 1 users

tulsagraphics

New Member
Upon closer observation, I am seeing an issue....... the seams of the boards are not going through the image.
Was there an appliqué of some kind that was applied to the boards to give a 3-D effect ??
View attachment 181540
Good catch. I just asked the operations manager. He said it actually was a single sheet of ply -- worn down / separated over time. Occasionally repainted. Given the vertical grain in the paint vs. horizontal grain behind it, maybe the paint protected the veneer while the rest weathered away? Just guessing until I head over there for a much closer inspection.
 
  • Informative
Reactions: 1 user

John_Smith

Enjoying retirement in Central Florida
Since you have a CNC, you might offer the client the option of raised (3D) graphics.
Although I am a wood purist by trade, I am more comfortable with HDU for long-term exterior projects.
 
  • Agree
Reactions: 1 user

unclebun

Active Member
Given that explanation, it seems the best way to reproduce the worn out sign would be to use plywood. No guarantees on what the inner layer will look like, so it may or may not have the horizontal "boards" of the original. And given the lower quality of lumber nowadays, it will probably be crappy looking wood.

I think you could do this with MDO. Using your vector drawing, make a paper pattern and pounce it onto the primed MDO. Hand paint the design, probably in several coats with adequate drying time. Make sure to go outside the outer lines ("bleed"). Then do a very shallow routing of all the outside of the design, just taking away the resin laminate and adhesive, and exposing the underlying top layer of the plywood. If desired, also route the separation of the "boards" the original had.

If you want there to be wood grain showing through the paint, you'd have to use plywood without overlay. However to get to the next layer of plywood would be probably almost a 1/8" depth.
 
  • Agree
Reactions: 1 user

tulsagraphics

New Member
What are the "realistic" expectations of the client?
Since this is an outside sign, exposed to all of the elements that Mother Nature will throw at it, you would not want to skrimp on materials.
Be realistic and give the customer what they want. If this is something outside of your skill sets, it is very okay to pass on the job.
Being an accomplished woodworker and knowledgeable painter would help.
Appearance-wise, they're requesting a replica. I'm thinking more along the lines of a 20 year aged look vs. 50 so we're not simply handing them a destroyed / compromised sign. It will certainly look cleaner than what they have now. Internally, I'd want to use a steel frame vs. the original 2x4s (and extra guy wires to keep it from swinging). FYI - The original sign is actually hollow. Basically a 2x4 frame, 3/8" ply on each side, then trimmed out. Nothing fancy. It has been repaired / repainted over the years, but I'm surprised it lasted this long.

I'm considering using the CNC to remove the veneer, which would expose the ply below it while giving a slight raised effect (possibly an aluminum backer for extra support.) We just want to avoid too much of that "machined" look. If I could figure out which type of wood / ply to use and the best way to rough it up (wire brush or pressure wash or something) I'd definitely pick up some pieces for testing.

I do have painters/woodworkers in the fam. More along the lines of contractors (kitchen remodeling / cabinetry) as opposed to artists, but plenty of staining experience. I don't "think" the oxidization part will be too difficult -- or the painting really. The client is interested in the texturing / patina effect more than anything else -- however we can replicate "some" of that.
 
  • Agree
Reactions: 1 users

unclebun

Active Member
If you leave the wood raw it will achieve the patina itself from exposure. You can help it along by soaking it with water and leaving it out in the sun repeatedly. I would not try to do that with paint or chemicals. The problem you'll have is that if you raise the grain in the wood before you paint it, it will be harder to paint. I suppose it they want the paint to start out looking bad, then weather the board before you paint it, and when you paint it, use thin paint that won't cover.

Personally I'd aim for it to look like it would after one of the times it got repainted.
 
  • Agree
Reactions: 1 user

Stacey K

I like making signs
Not to be simple minded but, I used to make all those wood signs like Board & Brush, and even had classes at my shop, I made hundreds of these as a side hustle. I used cheap pine boards, used hammers, screwdrivers, meat hammer things to beat the boards up then stained them, sanded it to look old, added some black carpet tacks to look like old nails. Then we used acrylic paint with stencil mask. When dry we used more sandpaper over the paint to make it look older. We then sealed them. Simple yet most of these signs are still looking good 8-10 years later. My parents have one on their cottage and my dad has resealed it 1-2 times in 10 years. Still looks good.

This project will be fun, I think you can definitely get very close to what they currently have.
 

Attachments

  • 1.jpg
    1.jpg
    820.7 KB · Views: 113
  • 3.jpg
    3.jpg
    90 KB · Views: 160
  • Agree
  • Love
Reactions: 6 users

Texas_Signmaker

Very Active Signmaker
This girls got talent
Not to be simple minded but, I used to make all those wood signs like Board & Brush, and even had classes at my shop, I made hundreds of these as a side hustle. I used cheap pine boards, used hammers, screwdrivers, meat hammer things to beat the boards up then stained them, sanded it to look old, added some black carpet tacks to look like old nails. Then we used acrylic paint with stencil mask. When dry we used more sandpaper over the paint to make it look older. We then sealed them. Simple yet most of these signs are still looking good 8-10 years later. My parents have one on their cottage and my dad has resealed it 1-2 times in 10 years. Still looks good.

This project will be fun, I think you can definitely get very close to what they currently have.
 
  • Agree
  • I Appreciate You
Reactions: 7 users

Signstein

New Member
We use a lot of Accoya and Tricoya here for our signage and architectural projects. It's good stuff. They have a gray siding that looks like it's most of the way towards your weathered look.
I would start here, do some of Stacey's techniques to punch up the weathering a bit, paint it, and add a matte clear. Would look good. I'm jealous - this does look like a fun project!

1773830075810.png

 
  • Agree
Reactions: 1 users

AES_TLS

New Member
You’re on the right track. I’d skip the pressure washer though, it can look a bit artificial. Wire brushing + sanding through layers of paint gives a more natural wear pattern.
 
  • Agree
Reactions: 2 users

Stacey K

I like making signs
We use a lot of Accoya and Tricoya here for our signage and architectural projects. It's good stuff. They have a gray siding that looks like it's most of the way towards your weathered look.
I would start here, do some of Stacey's techniques to punch up the weathering a bit, paint it, and add a matte clear. Would look good. I'm jealous - this does look like a fun project!

View attachment 181572

I love this! Looks like a great material!
 

tulsagraphics

New Member
Not to be simple minded but, I used to make all those wood signs like Board & Brush, and even had classes at my shop, I made hundreds of these as a side hustle. I used cheap pine boards, used hammers, screwdrivers, meat hammer things to beat the boards up then stained them, sanded it to look old, added some black carpet tacks to look like old nails. Then we used acrylic paint with stencil mask. When dry we used more sandpaper over the paint to make it look older. We then sealed them. Simple yet most of these signs are still looking good 8-10 years later. My parents have one on their cottage and my dad has resealed it 1-2 times in 10 years. Still looks good.

This project will be fun, I think you can definitely get very close to what they currently have.
Very nice work!
 
  • I Appreciate You
Reactions: 1 user

tulsagraphics

New Member
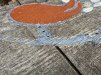
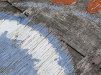
I don't know if this is helpful for anything, but here are the closeups.
 

Attachments

  • EJ-broken.jpg
    EJ-broken.jpg
    685 KB · Views: 81
  • EJ-weathered-veneer2.jpg
    EJ-weathered-veneer2.jpg
    1.5 MB · Views: 66
  • EJ-weathered-veneer.jpg
    EJ-weathered-veneer.jpg
    1.2 MB · Views: 56
  • EJ-broken2.jpg
    EJ-broken2.jpg
    723 KB · Views: 54
  • EJ-Joe.jpg
    EJ-Joe.jpg
    1.1 MB · Views: 69
  • Agree
Reactions: 1 users

tulsagraphics

New Member
I managed to score vector art from their current artist (obviously vector didn't exist 5 decades ago, so it's a digital artist's interpretation -- but I can work with it. EJ hires amazing artists.)

So here's what I'm thinking for my first test run. I've got some scrap white MDO (24"x 48"). The grain won't be going the correct direction to match that of the OG sign -- but it's just a test, so it's fine. 1/8" ball mill, low % overlap. 1/10 - 1/8" cutting depth (or w/e is required to get past that first layer). Nothing too deep. This should rough things up enough to help with wire brushing. The white (pre-finished / unrouted) MDO will hopefully protect enough of the surface that it won't be affected by the weathering techniques too much: Try out several options like steel wool + vinegar (maybe some black tea for the added tannins); a dark stain w/ a white wash, or maybe an accelerator (against the advice of unclebun ?) Everything else can be carefully hand painted with some thinned out paints. Not too careful though -- after all, I'll have to sand all the edges for "weathering". I'll just grab a pack of Red Bulls and a whiskey (j/k it's all whiskey) and go to town with some sandpaper. Joe and Buffy (yeah, those are their names) might need some stencil masks to help with the parka hood and teeth). Stencils?!! Bite me - I haven't hand painted before. Who knows, I could be the next Michelangelo who only -- just now -- came in contact with his first brush! :roflmao:

I do plan on checking out Accoya. Only a few places sell it. I put in a few requests with their distributors.
 

Attachments

  • 1773899466232.png
    1773899466232.png
    2.9 MB · Views: 112
Last edited:
  • Agree
Reactions: 1 user

John_Smith

Enjoying retirement in Central Florida
Thank you for the photos. It's not whether we have any input or suggestions or not, it is always good to follow projects like this to see how other folks get it done. I, for one, am looking forward to following your journey on this one.
Thank you for including us in this project.
Actually, you are crossing two entirely different skill sets: Us Old-Schoolers would do it all by hand, and the new generation is using all electronics and machines.
 
  • Agree
Reactions: 3 users

tulsagraphics

New Member
Thank you for the photos. It's not whether we have any input or suggestions or not, it is always good to follow projects like this to see how other folks get it done. I, for one, am looking forward to following your journey on this one.
Thank you for including us in this project.
Actually, you are crossing two entirely different skill sets: Us Old-Schoolers would do it all by hand, and the new generation is using all electronics and machines.
Fair enough.

This is a little bit more of a passion project than a lucrative one. If only doing it for the money, I would simply pass on it. However, it gives me the chance to try things I've never done before, for a highly visible sign which will probably be up for many decades --everyone knows Joe's! So that's exciting. But I can't go completely balls to the wall and (attempt to) do it all by hand. With my crazy schedule it would take months. So for now, we use the new CNC, then finish everything else by hand. ;)
 
  • Agree
Reactions: 3 users

tulsagraphics

New Member
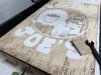
Progress update: My first attempt at a CNC wood texture turned out way better than expected. I'm sure it will look even better after a solid round of wire brushing. (1/8" ball nose on scrap MDO) The center of the bitmap was a bit light (less depth), so I'll have to finish that out by hand. I could try to re-CNC that section, but I don't yet trust the X/Y axis on the router after a restart. It might be okay, but I don't want to find out the hard way that everything shifted by 1/8". (I only have about 10 hours of "hands on" CNC machine time under my belt)

Note: It took entirely too long to CNC this (9 hours?) -- so I definitely need to optimize this file. Hopefully I can get away with a 1/4" ball nose for the full size sign (if I take the job).

As a quick reminder -- they want me to build the new sign, and I want to do it, but I haven't accepted the project. Right now I'm simply trying to figure out if "I" can actually pull this off entirely in-house, at small scale, and show them a promising result. I'm learning most of these techniques for the first time, without any in-person guidance -- but I have a full tank of enthusiasm, so we'll just have to see how far that takes me. It would be awesome if I could offer signs with some extra character (versus all the flat vinyl work that I do, day in, day out).

From what I've gathered, MDO is largely made up of Douglas Fir, but I can't confirm it. I've seen charts showing various stains / accelerators across different types of woods. Aged wood accelerator on Douglas Fir would look awesome if it comes anything close to the pics I've seen.

Now we (they) just have to decide, do we go with the branded red/blue they use on all their marketing? Or a very faded / oxidized version? I would choose faded. Marketing says "current Pantone". The operations manager says "faded". I'll let them duke it out and get back to me. lol Meanwhile, I have a few sets of Mack brushes on order.
 

Attachments

  • 24x36-MDO-first-pass.jpg
    24x36-MDO-first-pass.jpg
    773.2 KB · Views: 131
Last edited:
  • Love
  • Agree
Reactions: 3 users
Top