• I want to thank all the members that have upgraded your accounts. I truly appreciate your support of the site monetarily. Supporting the site keeps this site up and running as a lot of work daily goes on behind the scenes. Click to Support Signs101 ...

How to layout long cut vinyl graphic, to conserve material?

MGB_LE

New Member
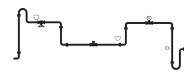
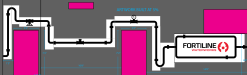
Vector art is sized at 5% of final size. We'd normally print panels of 3M IJ 180 but that client didn't like that quote. There's a color logo inside the pipe rectangle, which we'd print in color as a transfer logo. For the pipe, my next idea was black cut vinyl, but how to take the client design and make efficient use of a 48" wide roll of 3M 715 vinyl to cut and weed on our Summa T2 S160. It'd be great to chop this up and nest segments and have some sort of legend to not be wasteful of the material. Is that too much to ask? What feedback do you have for me?
 

Attachments

  • Wall Decal_Pipe_Only.pdf
    398.2 KB · Views: 51
  • Wall Decal_Pipe_Only.jpg
    469.2 KB · Views: 20
  • Wall Decal-total_wall.pdf
    462.2 KB · Views: 24

Geneva Olson

Expert Storyteller
can you plot with registration marks and line it up that way? I sell trade show displays too. The frames are put together with symbols. Like open stars connect to open stars. Perhaps you can have some sort of registration mark like that to make each segment have a different registration mark so you can line them up.
1763660965077.png
 

JBurton

Signtologist
Is that too much to ask?
For quoting, yes.
For conserving material and increasing profit, still potentially yes.
For your own satisfaction, that's up to you.
Personally, I'd nearly throw my hands up if they didn't like an ij180 price, 7125 is going to make the install longer, especially if something gets stretched as it doesn't shrink nearly as well as ij180, and the price point is very similar, at least before laminate.
 
  • Agree
Reactions: 1 user

unclebun

Active Member
That design is easy to cut up into pieces and install piece by piece. Faster than trying to wrap the whole wall and you could cut it on 24" vinyl most likely. Don't think of doing paneling, just pieces that join up with a small overlap--just like you'd do with real pipe. And as suggested above make registration marks at the various ends which you cut and weed onto the adjacent pieces to ease assembly. The simplest registration mark is two rectangles 1/4"x3/4", one flipped 90 degrees and centered on each other and combined to make a little intersecting cross that weeds into 4 squares arranged in a cross with the center hole removed. You cut the pieces apart manually. Not by some automated method.
 
  • Agree
Reactions: 1 users

victor bogdanov

Active Member
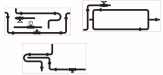
use artboards to split up the design, draw a bunch of artboards as you see fit, small overlap between boards. Export each artboard as pdf. Nest/ print / cut

I like to use hexagons as registration marks

1.png

1.png
 
  • Agree
Reactions: 3 users

DarkerKat

design & such
use artboards to split up the design, draw a bunch of artboards as you see fit, small overlap between boards. Export each artboard as pdf. Nest/ print / cut

I like to use hexagons as registration marks
^ this is the way to do it. I might be inclined to split it in different locations but if you're going to break it up this is the right process.

That said, I'd agree with JBurton - at most, this is a production process to save your company money and optimize material use - Clients pay for the size of the finished graphic.
 

guillermo

New Member
this is how I will do it..... assuming that you can fit it in 15" material or 24" depending on the size.
When I have a long and skinny file to cut, I place it in a way that I will use the material more efficiently, I will have to do a more that one splice or split, but saves material. It may look more work, but I've done many times and I will say that is easier than apply transfer tape to a big piece with a little of the material used, installation could be more difficult. Just mark where the vinyl where it should be from the ground or use a laser to line it up all the pieces then install one by one, of course.
Last time I did a 6.5"" tall text by almost 14 ft long, I used my 30" material and fit the top left of the text at the top, then copied the same text and place as a second line on text and move it to the left to fit, then the next part of the text, I was able to cut only 30" material by 48" long, one time apply transfer tape and then just match the text, cut the overlap and finally, get the 6.5" tall text by 14ft long.

And I did this manually, did not use the art board option, which is a good option too, and I use it when I do a big murals, last month I did one that is 112" tall by 35ft long.

 

Attachments

  • Wall Decal_Pipe_Only.pdf
    558.1 KB · Views: 8

MGB_LE

New Member
this is how I will do it..... assuming that you can fit it in 15" material or 24" depending on the size.
When I have a long and skinny file to cut, I place it in a way that I will use the material more efficiently, I will have to do a more that one splice or split, but saves material. It may look more work, but I've done many times and I will say that is easier than apply transfer tape to a big piece with a little of the material used, installation could be more difficult. Just mark where the vinyl where it should be from the ground or use a laser to line it up all the pieces then install one by one, of course.
Last time I did a 6.5"" tall text by almost 14 ft long, I used my 30" material and fit the top left of the text at the top, then copied the same text and place as a second line on text and move it to the left to fit, then the next part of the text, I was able to cut only 30" material by 48" long, one time apply transfer tape and then just match the text, cut the overlap and finally, get the 6.5" tall text by 14ft long.

And I did this manually, did not use the art board option, which is a good option too, and I use it when I do a big murals, last month I did one that is 112" tall by 35ft long.
Thanks for this. My concern is that my estimator needs prepress to break this down into pieces before he can even quote it. How do you quote it so that you know how much material is required?
 
  • Agree
Reactions: 1 user

unclebun

Active Member
Thanks for this. My concern is that my estimator needs prepress to break this down into pieces before he can even quote it. How do you quote it so that you know how much material is required?
You cut the pieces apart in your design software, not in a RIP. You draw rectangles showing the cuttable width of the vinyl in your plotter (i.e. 23" for 24" vinyl, 28.75" for 30" vinyl) and then place the pieces of your design in the rectangle using your brain and your mouse, not some automated software that's not designed for this. Then you use the calculator app of your computer to calculate the area of vinyl that will be used. This requires that your designers have to be able to think beyond just drawing pictures so that means they have to use their brains a little bit rather than just draw a picture and pass it on to another person who can't use design software whose only function is to put the design in some software and see what number it spits out.

Guillermo did it for you. Without actually calculating the length of vinyl needed and the price.

And JBurton is wrong. Doing this in pieces of cut vinyl will take a tiny fraction of the time wrapping the whole wall would take.
 

JBurton

Signtologist
And JBurton is wrong. Doing this in pieces of cut vinyl will take a tiny fraction of the time wrapping the whole wall would take.
Not saying that it would be faster to wrap the wall, so much as that using the 7125 vs 180, 7125 will not behave the same way, and unstretching /shrinking that stuff is nothing like the 180. It will shrink, but much slower, and it needs a wider area to actually shrink.
I'd still do it in whatever wrap film, break it down to lengths with bends, cut extra pieces of the fittings, and lay them over the seams. At least this way it looks kinda deliberate.
 

guillermo

New Member
Thanks for this. My concern is that my estimator needs prepress to break this down into pieces before he can even quote it. How do you quote it so that you know how much material is required?
All you need to do is find the material that this file will fit and do the estimate, my suggestion is speed up a little and save material, but for estimate, I use the whole material.

Just got a customer to do letters, 24" tall by 48" long, 3 big numbers, just the material is about $3000, yes, 3 grand, 3k, and I will use only half, but the customer is paying for the entire roll of material.

But I came back to tell you that if you use panels, or art boards, as Victor mentioned, is a great option, I use that when doing murals and I set the space between art boards to -1", yes, that way, if the art board is 48", the next board is also 48", but it will be 1" overlap on the previous art board, very useful when installing, I will install my left art board and then place a 1" blue tape on the edge of the panel and that will my alignment.
 
Top