I had been looking for a way to view photos at actual size in Flexisign to determine if the artwork that our clients had sent will be of good enough quality for the proposed
sign application.
In the past we just made a box, say 10", zoomed in and out until the box measured approximately 10" on the screen with a tape measure. We had to do this every time we wanted to see a photo at actual size. It was a little time consuming, so we figured out a hack. (see below). This is not 100% accurate, but depending on your tape measuring skills, can be very close.
This has to be done for each monitor that you use Flexi on, but you only have to do it once.
1) Make a box, any size.
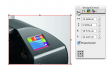
2) Click on the box, then use the Zoom to Selected tool.
3) Use a tape measure to measure the horizontal width of this box on your screen. Write down this measurement because this is the number you will use in the future for this monitor.
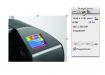
4) When you want to view something at actual size, make a box with the horizontal width that you measured previously.
5) Click on the box, then use the Zoom to Selected tool.
6) Now everything on the screen will be actual size.