Andrew Signs
New Member
Hi,
I picked up a JV33 recently and have been working through putting it back together and getting it functional.
I have replaced most of the items that were of concern and got it running. Weird bit is now, with everything working, it won't print at all. No test print or print from RIP. What's unusual is that it goes through the motions of printing toad it is getting all the right signals to print, just not shooting ink.
When you do a ink fill or anything like that ink does come through the lines etc which confirms capping and pump work.
Below is what has been replaced and/or repaired.
- New head
- New head cables
- New power supply board
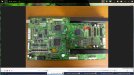
- New Main PCB
- New Dampers
- New Pump & lines
- New cap/station
I have confirmed all ribbons/cables are connected correctly.
I did a search around and found a few posts but with no clear answer or result. Has anyone else encounter this problem? I can only presume that the slider board is not sending the 'ink' trigger ad everything else is repaired or replaced?
Also to confirm, the printer itself functions in every other way perfectly (head assembly movement, ink pulls, pump, no errors on screen etc)
Thanks!
I picked up a JV33 recently and have been working through putting it back together and getting it functional.
I have replaced most of the items that were of concern and got it running. Weird bit is now, with everything working, it won't print at all. No test print or print from RIP. What's unusual is that it goes through the motions of printing toad it is getting all the right signals to print, just not shooting ink.
When you do a ink fill or anything like that ink does come through the lines etc which confirms capping and pump work.
Below is what has been replaced and/or repaired.
- New head
- New head cables
- New power supply board
- New Main PCB
- New Dampers
- New Pump & lines
- New cap/station
I have confirmed all ribbons/cables are connected correctly.
I did a search around and found a few posts but with no clear answer or result. Has anyone else encounter this problem? I can only presume that the slider board is not sending the 'ink' trigger ad everything else is repaired or replaced?
Also to confirm, the printer itself functions in every other way perfectly (head assembly movement, ink pulls, pump, no errors on screen etc)
Thanks!