• I want to thank all the members that have upgraded your accounts. I truly appreciate your support of the site monetarily. Supporting the site keeps this site up and running as a lot of work daily goes on behind the scenes. Click to Support Signs101 ...

Newbie Tatami fill question

signman315

Signmaker
Hello to all! I’m having trouble getting my Tatami fills to close without any gaps. Haven’t had any trouble before but all the sudden its happening on a couple files...I digitize my own stuff in Wilcom and haven’t had any trouble with this until now. I’ve attached a picture showing the yellow circle...it shows fabric about half way up where there’s a horizontal gap in the fill. I’ve got an edge run and zig zag underlay on it and it splits at the problem area from the start/stop points but if I run it from end to end the it turns the circle into an egg shape...any help is appreciated, thanks!
 

Attachments

  • 936D2D8F-3701-4F33-8ADA-AA5222F301FA.jpeg
    936D2D8F-3701-4F33-8ADA-AA5222F301FA.jpeg
    852.9 KB · Views: 781

WildWestDesigns

Active Member
This almost looks like an issue with long stitches (has to do with start/end points relative to the stitch angle (which looks to be a flat angle)). Where are the start/end points (green triangle, red cross hair for the object?) Can overcompensate for this by overpowering with stabilizer. Very rarely is one sheet of stabilizer good for all types of embroidery. Especially with trying to use one file for so many substrates fabric types.

Zig zag underlay is more often associated with satin stitches. Was a satin tool used to create this object and then a tatami top stitch applied to that object after the fact? Or was auto conversion used?

Very rarely do I use edge run underlay for anything, but the main underlay that I would use for fills (Wilcom calls tatami) would be a tatami underlay.
 

signman315

Signmaker
So it’s imported as a vector graphic...then the tatami tool is used to convert it to stitches but did not use the satin tool...by default it places an edge run and zig zag underlay underneath the actual tatami fill itself...my stitch length is 2.5mm and density is .35...start point is bottom center and end point is half way up on the right side so it does the underlay then works the fill in from the bottom to half way up then runs to the top and works the fill from the top down to meet about half way down...but it doesn’t want to meet and leaves a gap...I’m having my guy do another test right now...my zigzag underlay was at the same angle as the fill which I think is allowing distortion so rotated the underlay by 90 degrees and we are testing that now...any insight you have is appreciated :) it’s happening on a few files but only on Tatami fills, satin and runs look great...it wouldn’t be a hardware/machine issue would it? It’s a 6 month old Barudan so I wouldn’t think so...I’m focused on the digitizing but don’t want to overlook any possible hooping or mechanical issues either...
 

WildWestDesigns

Active Member
start point is bottom center and end point is half way up on the right side so it does the underlay then works the fill in from the bottom to half way up then runs to the top and works the fill from the top down to meet about half way down...but it doesn’t want to meet and leaves a gap..

So it would be fair to say that your stop point is approximately, if not exactly where it's not wanting to meet, based on above?

If so, what is happening is what is called long stitches.

Some more complex objects you can't stop this from happening (but have to plan on mitigating how much of an effect it will have on the design), but on an object like this, you can. Either need to change the angle or need to change the stop point. Which ever one that you change depends on the design, where the start point of the next object is (if there are any travel stitches to mitigate trims etc). Personally, more often then not, I change the end points as stitch angles and their use can be very dependent on the object and substrate used. For instance, if using the same stitch angle on picque as the weave, you can get what is called "spooning" (where the edges of fills curl upwards).

When you digitize are you creating your own start/end points or just clicking enter, enter, enter til the object is generated? Do you have the module that allows for editing start/end points after object creation?
 

signman315

Signmaker
Thanks again for your help...I've attached a screen shot of my angle, start/stop, and settings. I purchased Wilcom E4 and have full editing capability. I'm manually setting start/stop points, stitch angles, density, pull comps, and can adjust anything. Full and very expensive version of the software lol...

Yes my stop point is ending early and causing the gap...almost as if it filled a few more rows of stitch then it would be fine. I guess one could say that the first 50% of the fill isn't going far enough either...but I'm not sure which is those two is actually the case. Waiting to hear back from my operator on the latest test but if it's no good I'll send a picture... I rotated the underlay perpendicular to the fill in the hopes it will hold the unstable fabric together and close that gap...

Also just so I'm uderstanding the "long stitches" issue...is it caused by long runs in the same angle? If I tilt the stitch angle from horizontal (0 degrees) to 15-30 degrees and perhaps move the stop point up to say roughly 75% up the circle would that be a reasonable suggestion to help fix it?

Good tip on the "spooning"...makes sense though. If the tension from the thread is pulling in the same direction as the weave then it wouldn't be stable in that direction and would curl/spoon.

Again really appreciate your help here man, I want to learn as much as I can about digitizing/embroidery and have seen many of your other embroidery related posts so I'm pumped to finally get some of your help myself!!!!
 

Attachments

  • screenshot-1.jpg
    screenshot-1.jpg
    1.1 MB · Views: 525

WildWestDesigns

Active Member
Long stitches is definitely the issue.

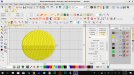
Look at your screenshot to the left of the stop point cross hair. Notice that that row of stitches is visually different then the others? That's how long stitches is generated visually in Wilcom.

Also just so I'm uderstanding the "long stitches" issue...is it caused by long runs in the same angle? If I tilt the stitch angle from horizontal (0 degrees) to 15-30 degrees and perhaps move the stop point up to say roughly 75% up the circle would that be a reasonable suggestion to help fix it?

This is me speculating, but it has to do with the stitch engine and how the math handles that last stretch (or row) of stitches. I've seen this is other programs (typically long stitches like this very well with this particular object, are what make seasoned digitizers think auto conversion, this type of stuff always needs to be cleaned up).

What I would suggest doing, is keep in mind what angle that you want it to be (sometimes this is determined by the substrate (as mentioned before) or by the design itself (as you start doing blends etc, angles are going to be more resolute in what they should be)) and try to put the end point is the most out of the way spot to mitigate how this row shows up. If doing a horizontal angle fill on a circle, I would would want my end point to be either the very top or the very bottom. If there is another object that I want that end point to connect to in order not to have a trim, then that may have a bearing on where I put it.

If I'm going to have a 90 degree angle, my end point will either be far left or right. This does get more complicated depending on how complicated the shape is (for instance, if doing a fill stitch of "P") you won't be able to visually hide long stitches at all only try to relegate it to the smallest portion that you can on the object.
 

WildWestDesigns

Active Member
It’s a 6 month old Barudan

I forgot to mention this. I do have a Barudan machine (best ones out there) as well and I also noticed that you have Wilcom set to the Barudan machine.

If you really want to get adventurous, go into the Stitch List and you'll have the ability to insert Slow/Fast commands to very specific stitches.

So, if you set a Slow command at say stitch 2270, the machine will slow down to whatever it's slow speed is set at once it hits 2270 and it will either stay at that speed until it reads a Fast command (which is really "go normal set speed") or the pattern is done. This is great for detail and or small embroidery that the machine really needs to go slower then normal and you don't have to baby sit the machine or even remember each time to do this. It's hard coded into the pattern and every time that pattern is loaded it does this.

This is only supported in the Barudan U?? file, so that file format must be used for this to work. I've only known Wilcom and one open source embroidery program have this functionality working.
 

signman315

Signmaker
Awesome!! Really great advice all around...we will adjust and test and see what the results are, probably in the next day or two. Going to eat dinner and chill for the night and get back at it tomorrow. Thanks again for all your help, I’ll report back with our results, thanks!!!
 

signman315

Signmaker
Hey Wild West Designs! I just wanted to follow up and thank you for your help again. ALL of the advice and suggestions you provided were dead accurate. Long stitches was the problem and the fix you suggested was indeed the fix that made it better. I didn't grab a picture of it but it came out absolutely perfect! I learned a lot in this interaction and had fun doing it. Thanks again!!!!
 
Top