• I want to thank all the members that have upgraded your accounts. I truly appreciate your support of the site monetarily. Supporting the site keeps this site up and running as a lot of work daily goes on behind the scenes. Click to Support Signs101 ...

Roland PC-60/Flexi Spot color question (Noob)

arcman

New Member
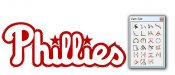
I've created a two color logo (raster/bitmap) in Photoshop using black and a reasonable facsimile of gold. The Roland color choices aren't available in Photoshop's swatches. Should they be?

After importing into Flexi 8, how do I get it to substitute Photoshop's gold with the Gold Metallic cart in my Roland PC-60? I'm new to Flexi and managed to get to the point of printing, but from here it looks daunting. Lots of options. I haven't tried printing it yet, but I'm guessing it won't just pick the gold cart and run with it.

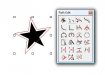
I did try color picking the gold (in Flexi) and filled it in with Roland's gold but it gets a bad case of the jaggies, looking awful compared to the original Photoshop file.

Any suggestions?

Also, when using Contour Cut, I have a space between two words and Flexi splits them. Is there a way to join the two to make one cut? Is there a way to draw the contour cut outline? I'd like to make it follow the letters but a much smoother overall cut, not bumping over every nook and cranny.

Thanks.
 

Steve Rife

New Member
arcman,
In order to get your PhotoShop's gold to map to Roland's gold ribbon you need to...
  • Open your job in Flexi 8.
  • Right-mouse click on the color bar and select "Open Table" from the context menu. In the Open dialog browse to the Swatch > Library > Roland folder.
  • Select PC-50.slb and open. A new color palette will open containing several spot colors
  • Change the gold color in your job to the one found on the new palette.
  • Enter the RIP and Print Dialog and select the 3rd tab or "Advanced Options".
  • Verify "Use printer spot colors" checkbox is checked and the gold color is mapped correctly under the "Mapping..." dialog box.
You can do the same thing for the black too if you desire.


In regards to your 2nd question, you can modify contour cut lines just like any path within the software. Once you apply your contour cut to your job through the Effects menu, right-mouse click on the design and select "Separate Contour Cut". De-select everything by clicking into a blank area of your design and only select the contour path. Open your path editing tools found on the Main Toolbar (between Shapes and AutoTrace) and edit the path to your desire. In the screenshot attached, I removed one of the contour cut points of my star design.

The only issue you may experience is that the contour cut is no longer attached to the design, so any changes you make to the job will not effect the cut line.
 

Attachments

  • path.jpg
    path.jpg
    17.5 KB · Views: 106

arcman

New Member
Steve:

Thanks so much for your time and info.

The contour cut help was exactly what I was looking for.

I still can't get the color thing working properly. I already had the Roland Gold Resin color in the palette but I can't get the fill to "change the color".

Since this is a bitmap/rasterized image from Photoshop, don't I somehow have to break my two colors apart to be able to apply the Roland fill color?

Basically, I have a letter with gold fill and a black stroke. I'm assuming, in Flexi, I have to select the gold and then change/fill with the Roland spot color. I've tried vectorizing and color tracing but haven't stumbled upon the right combination to split the two colors and fill.

I will dig a bit deeper in the manual and try to figure this out. If I come up empty, I'll come back for more help.

Thanks.

Lee
 

Steve Rife

New Member
yes... spot color mapping only works on vector objects. raster images will only use CMYK (process colors)... sorry I missed that in your original post. :doh:
Are you to trace only the gold, then add a black outline in Flexi to act as the stroke you desire?
 

arcman

New Member
Got it!

My $50 PC-60 works! That only took two days of fiddlin'.

I ended up converting my raster image in Illustrator to a vector image then importing into Flexi and assigning the Gold color.

It cut perfect but I do see a couple of faint lines through the image. It's not missing the colors but looks like small needle sized dot-dot-dots across where the resin is laid down. My image is small (1"x2-1/2") so it's only noticeable with a magnifying glass. I will try printing something bigger to see if the head is bad. So far - so good!

Thanks to Steve and the rest for the tips.

Is there any way to reduce the amount of points automatically generated by Contour Cut? Between the amount of points and the itty-bitty anchor size, it consumes quite a bit of time deleting and then re-doing the Beziers.

Lee
 

Steve Rife

New Member
Lee,
See attached screenshot that began as a tiny jpeg. Even though this is not a contour cut, the procedures will remain the same. There is a "Reduce Points" editing tool that will assist with the very fine details. (Row 3, Column 3 in my expanded toolbar) However, you have no control over what points are removed and overuse may distort your job in the end.

Other than individually selecting each point and removing them... when looking at a job like the attached image, I break down each line into segments. For curves I would use something like the "Optimize by Curve" (2, 3), and for straight lines I would use the "Straighten Points" (1, 4). Removal of points between a straight line will not cause any distortion.

For paths that appear as basic shapes (like the starbursts dotting the i's in this logo) I simply redraw with the shape tool, or select the shape and use Arrange > Convert to Shape > Starburst.

Hope this helps a little.
 

Attachments

  • points.jpg
    points.jpg
    35.4 KB · Views: 81
Top