It's not complicated at all... It's time consuming.
If you want it done right, that's what it takes... time.
If you want a half assed kit that 'might' fit, then 'bang' it out from a photo and hope for the best.
Here are the detailed instructions on HOW to do it RIGHT, however you can do it however you like, remember, garbage in garbage out!
The best way I have found to make very accurate full size templates for motorcycle fenders and panels, is to use a low tack clear or frosted vinyl, print a 1" square grid over the full width vinyl, using blue or black ink (more about the grid later).
Then cut a over-sized piece of the transparent grid sheet and apply to the various parts of the motorcycle (panels), then using a Sharpie fine point maker trace or draw the outline of the template edges you want on the transparent vinyl, for straight lines you can just make precise dots at the intersecting corners and ad a note to connect the dots by drawing a straight line later.
After you complete the drawing for the template you want to make, remove the transparent grid sheet and apply it to a piece of gator board just slightly larger then the transparent grid sheet.
Now you have a true full size template for that panel (fender), even if the panel had bends or curves now that you have flattened the template it will be a true fit when you cut your decal to match the template.
Ok, now come the hard part, you have to convert this full size flat template into a digital template to use with you design software. There are two ways to do this, you can use a good quality digital camera with a lens that has a longer focal length than normal to eliminate distortion (I use 85-100mm ), and either photograph the flat template as a whole image or divide it into sections and photograph the sections and stitch them back together in Photoshop (the 1" square grid will help align the images).
The second option which I use for smaller templates, I use a 11x17 flatbed scanner, to scan the flat tracing made above, again if the template is larger than 11x17, I will scan the flat template in sections then stitch the image back together using Photoshop. The 1" square grid on the flat template is what will keep everything lined up and true.
I create a full scale template in Illustrator with 1"square grids over the entire area on a upper layer, then import the photos of the flat template images and align them to the grid layer. If I have four flat template images (say the template was 22x34), I keep each section on a separate layer so they can be individually adjusted to line up with the AI grid in the top layer which is locked in position.
After getting my hand traced flat template images all lined up to the top AI drawn grid and everything looks good, save that master image and make a flattened copy to be used as you full scale digital template for designing any projects for this particular motorcycle panel (fender).
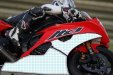
Sure you can just take a photo of a panel or fender and use that, however, I don't find many FLAT parts on motorcycles, most are rounded, domed, compound curves, etc. I find the method above will produce a TRUE flat representation of the various contortions of the panels on a motorcycle.
NOTE: If you need the template to be perfectly horizontal (level) to the ground, when you place the grid overlay onto the side panel, use a level to keep the grid level. Later when you install you decal the graphics will be perfectly level.
Good luck!