Hi,
I could really need some help")
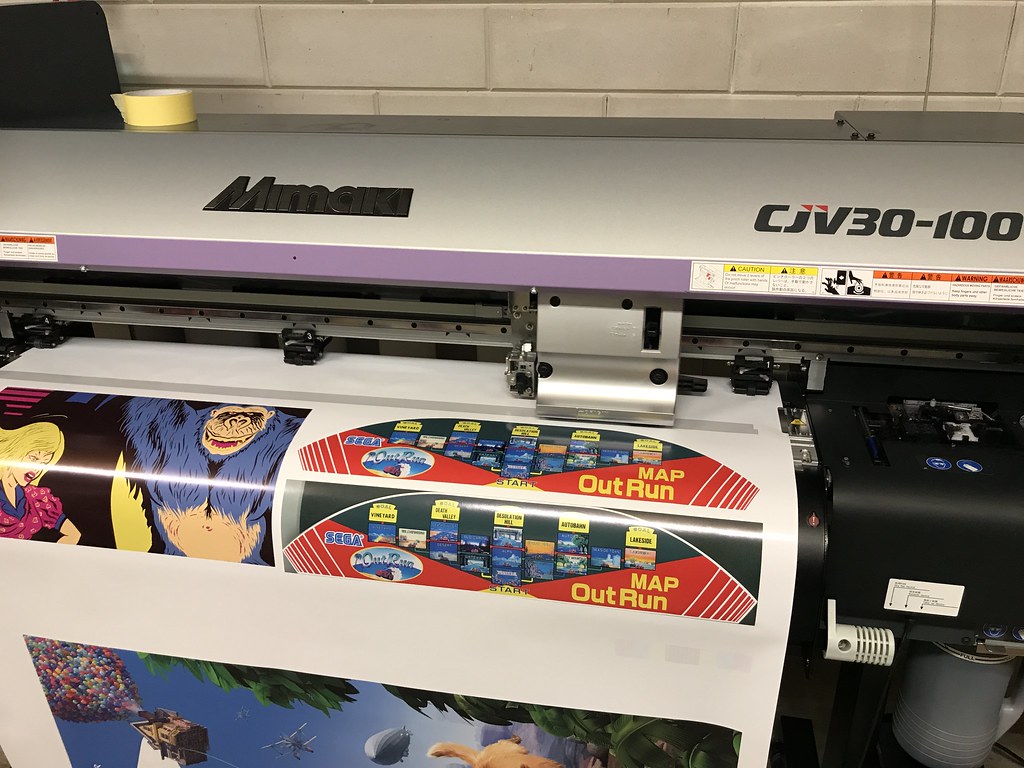
Bought a Mimaki CJV30-100 beginning of this year and this have been fun, printing things for clients like wallpaper, small contour cut stickers, doorstickers, windowstickers and some other things.
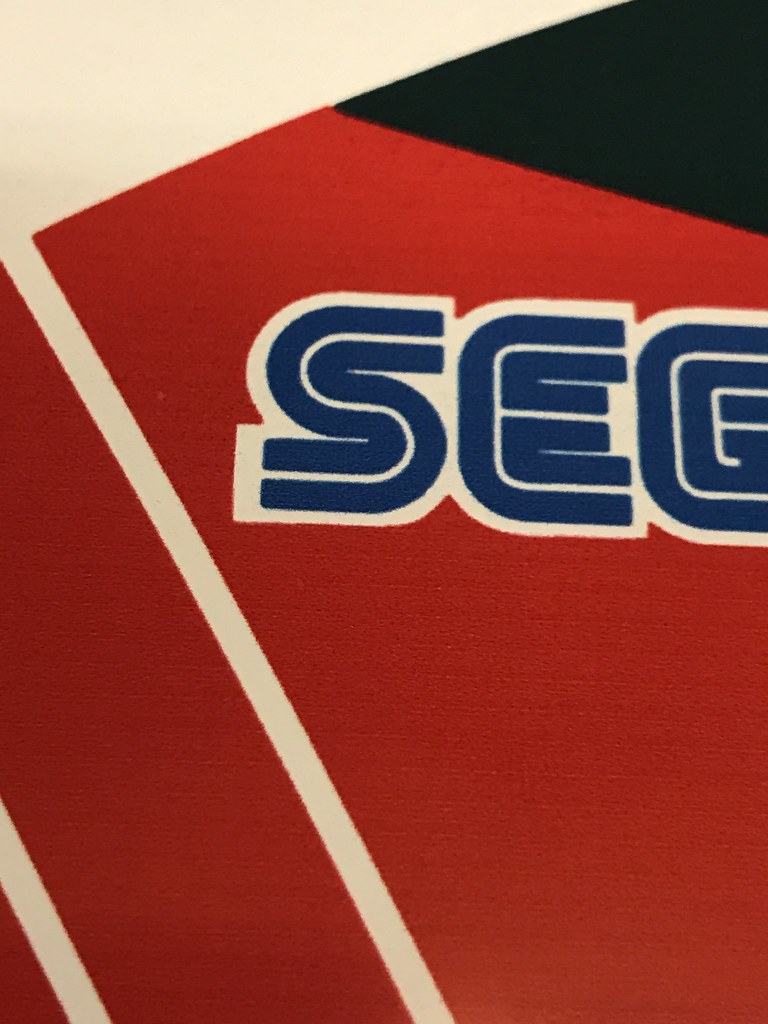
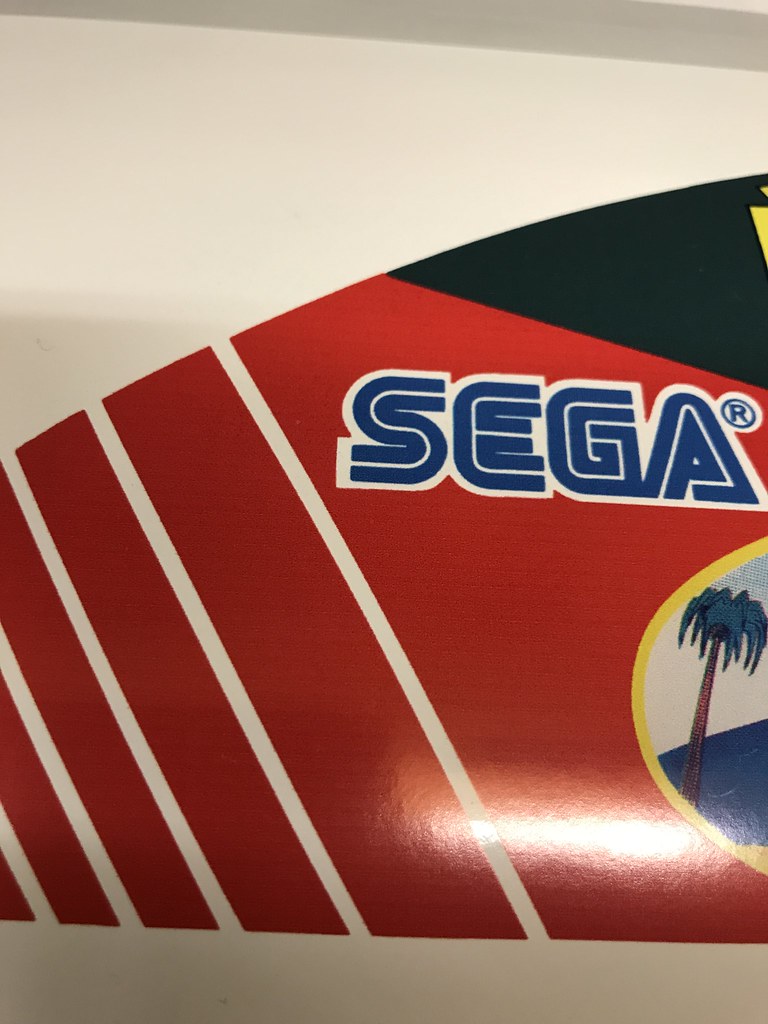
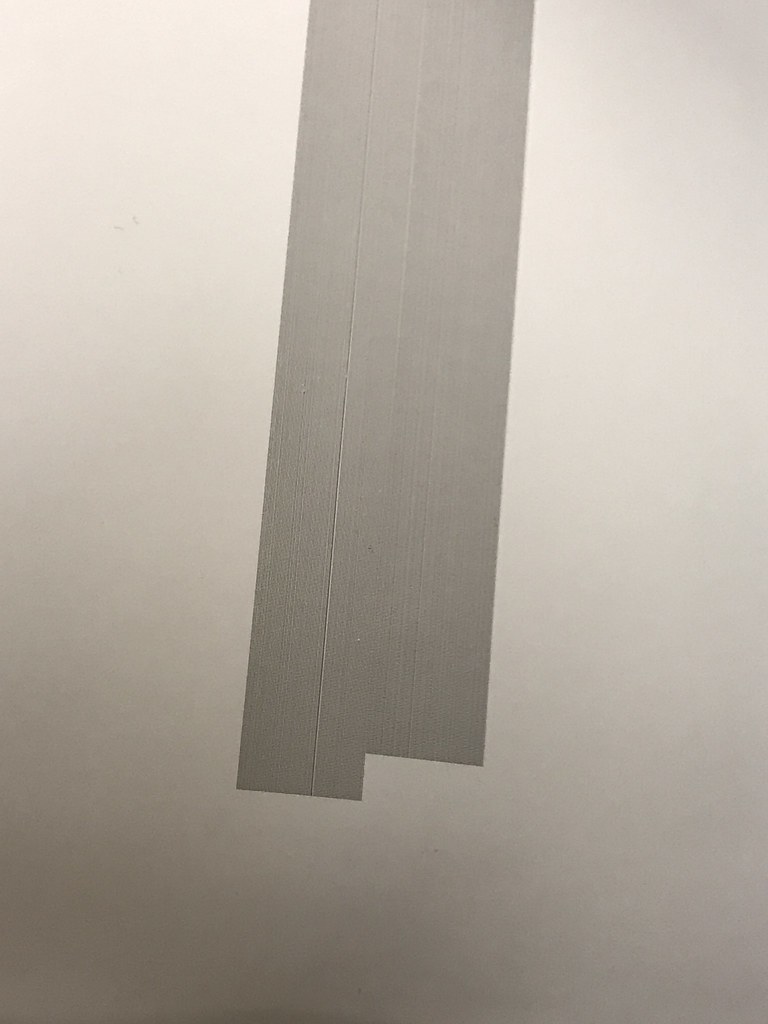
But now I have small visible line in my prints. Can't find a way to fix it.
Checked head height, currently set as "high". But with "low" setting I get the exact same results.
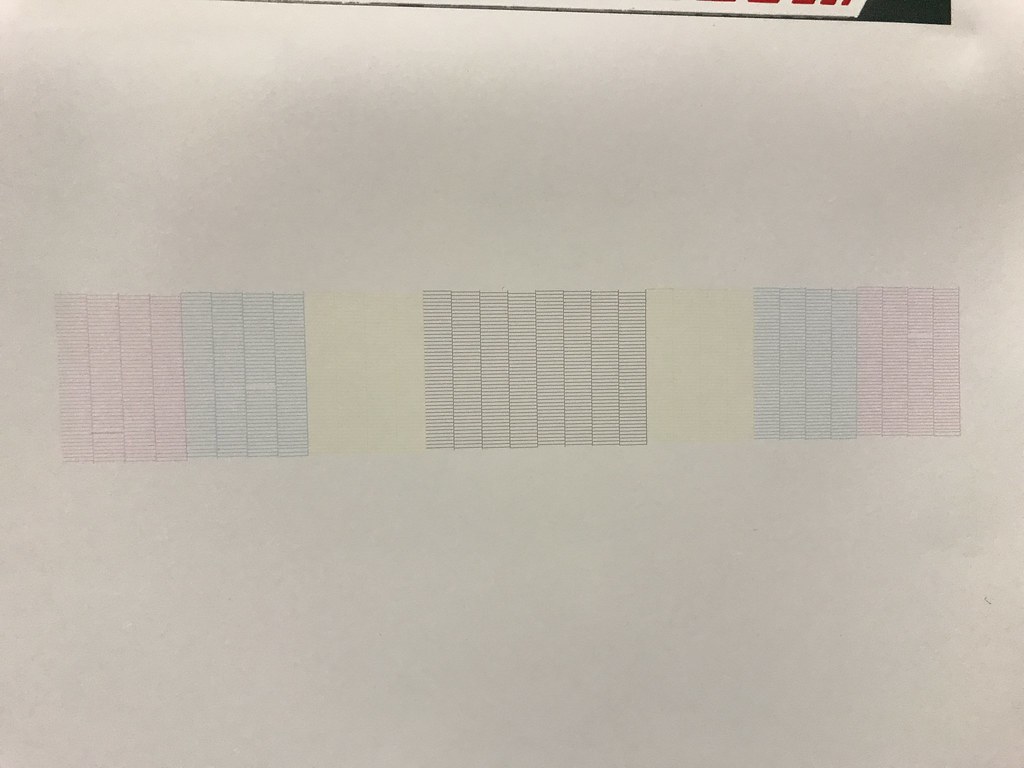
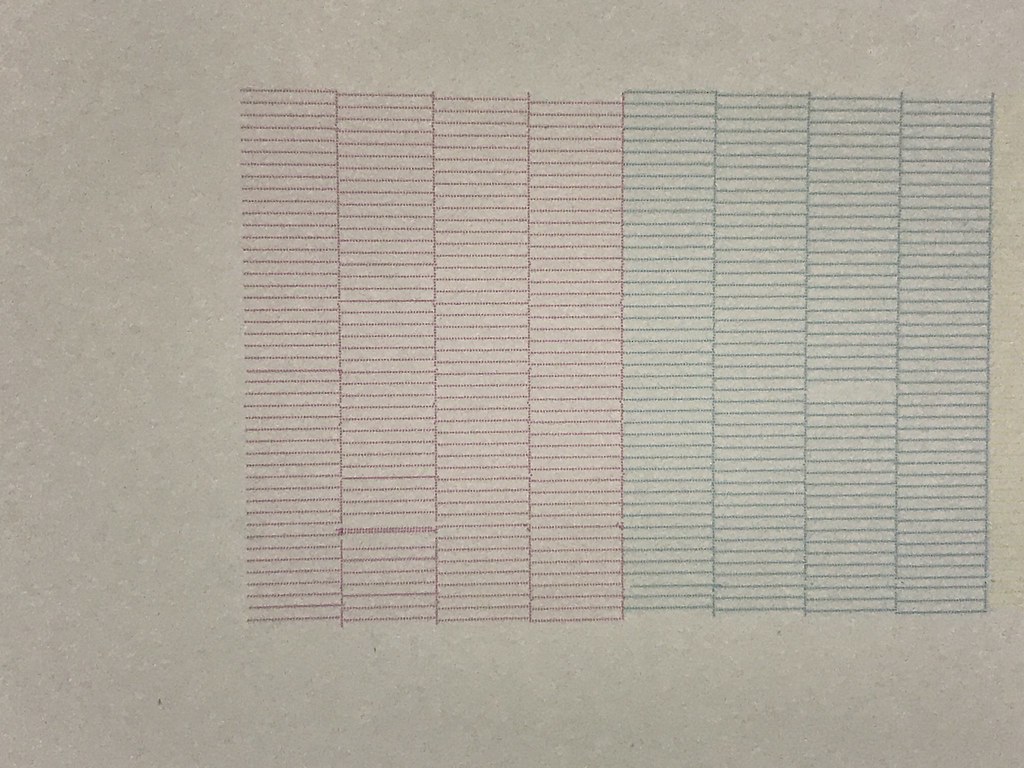
Checked the other setting, forgot the name, the one that prints two large grey row and you have to check that they don't overlap or have a gap in between. I do get a single thicker line in the lower grey row.
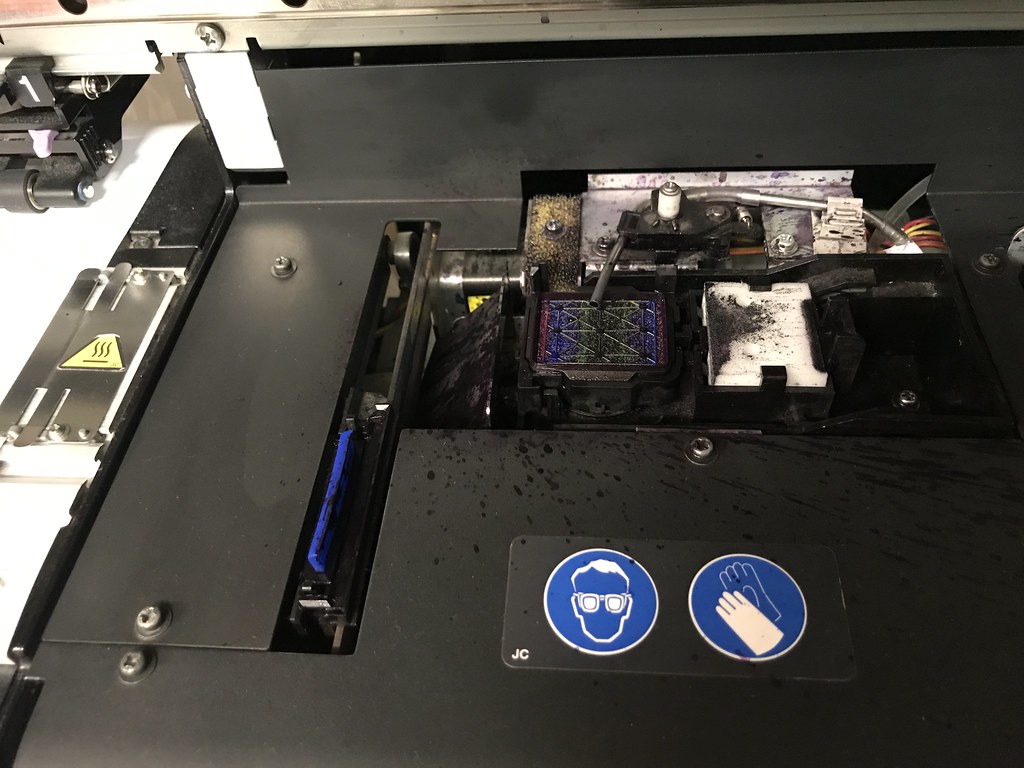
I also have quit some trouble keeping the machine up and running nice. Do clean the machine with swaps and cleaning programs, but when I don't use the printer for a couple of days, sometimes a week or more (vacation), I lose almost half of my nozzles at the nozzle test. Takes me about half a day of manual cleaning and automatic cleaning programs to get back to good results.
But the main question for now, how do I sort the "lines in prints" problem.
btw, the Sega Outrun artwork and the UP poster are raster images, hence the lower quality when zoomed in.
I print with the Finecut plugin in Illustrator, which then sends the files to Rasterlink 5.
Images below are printed at 16 pass. In the past, I didn't have these visible lines with the 16 pass setting. Haven't tested it with 8 or 32 pass yet.
Thanks for reading!
 IMG_2653 by barrybuise, on Flickr
 IMG_2648 by barrybuise, on Flickr
 IMG_1619 by barrybuise, on Flickr
 IMG_0723 by barrybuise, on Flickr
 IMG_0827 by barrybuise, on Flickr
 IMG_6203 by barrybuise, on Flickr
 IMG_7817 by barrybuise, on Flickr
 IMG_8565 by barrybuise, on Flickr
 IMG_2956 by barrybuise, on Flickr
 IMG_8693 by barrybuise, on Flickr
 IMG_9586 by barrybuise, on Flickr
I could really need some help
Bought a Mimaki CJV30-100 beginning of this year and this have been fun, printing things for clients like wallpaper, small contour cut stickers, doorstickers, windowstickers and some other things.
But now I have small visible line in my prints. Can't find a way to fix it.
Checked head height, currently set as "high". But with "low" setting I get the exact same results.
Checked the other setting, forgot the name, the one that prints two large grey row and you have to check that they don't overlap or have a gap in between. I do get a single thicker line in the lower grey row.
I also have quit some trouble keeping the machine up and running nice. Do clean the machine with swaps and cleaning programs, but when I don't use the printer for a couple of days, sometimes a week or more (vacation), I lose almost half of my nozzles at the nozzle test. Takes me about half a day of manual cleaning and automatic cleaning programs to get back to good results.
But the main question for now, how do I sort the "lines in prints" problem.
btw, the Sega Outrun artwork and the UP poster are raster images, hence the lower quality when zoomed in.
I print with the Finecut plugin in Illustrator, which then sends the files to Rasterlink 5.
Images below are printed at 16 pass. In the past, I didn't have these visible lines with the 16 pass setting. Haven't tested it with 8 or 32 pass yet.
Thanks for reading!
IMG_2653 by barrybuise, on Flickr
IMG_2648 by barrybuise, on Flickr
IMG_1619 by barrybuise, on Flickr
IMG_0723 by barrybuise, on Flickr
IMG_0827 by barrybuise, on Flickr
IMG_6203 by barrybuise, on Flickr
IMG_7817 by barrybuise, on Flickr
IMG_8565 by barrybuise, on Flickr
IMG_2956 by barrybuise, on Flickr
IMG_8693 by barrybuise, on Flickr
IMG_9586 by barrybuise, on Flickr IMG_5279
 IMG_3915
 IMG_2536
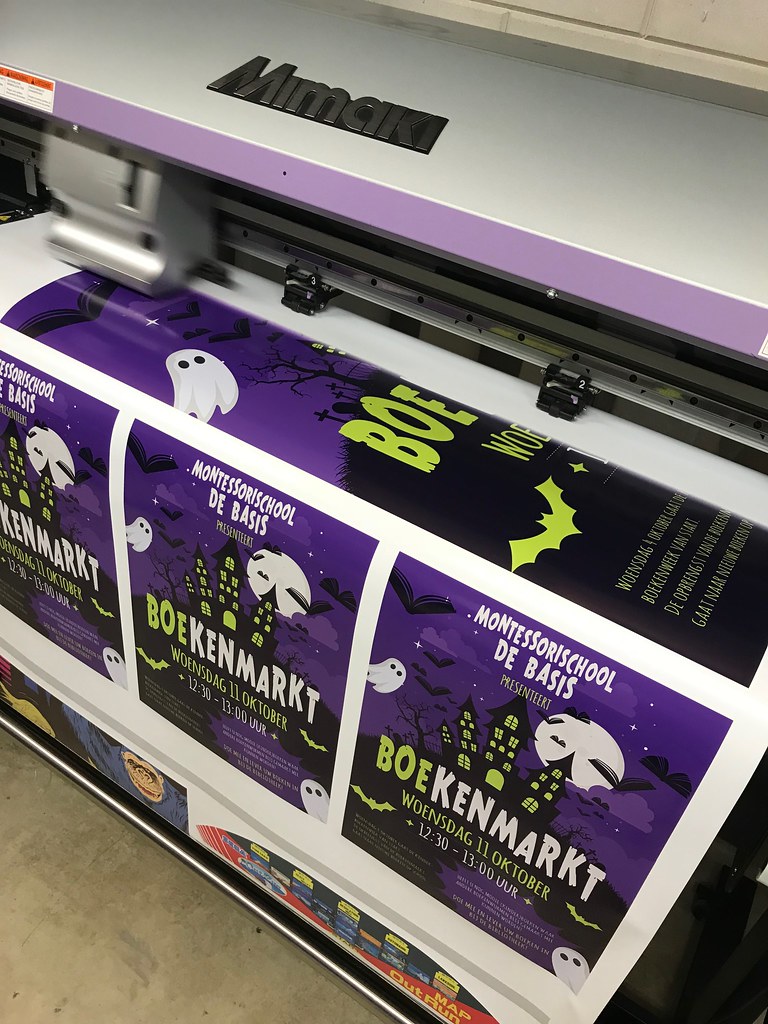 IMG_1858
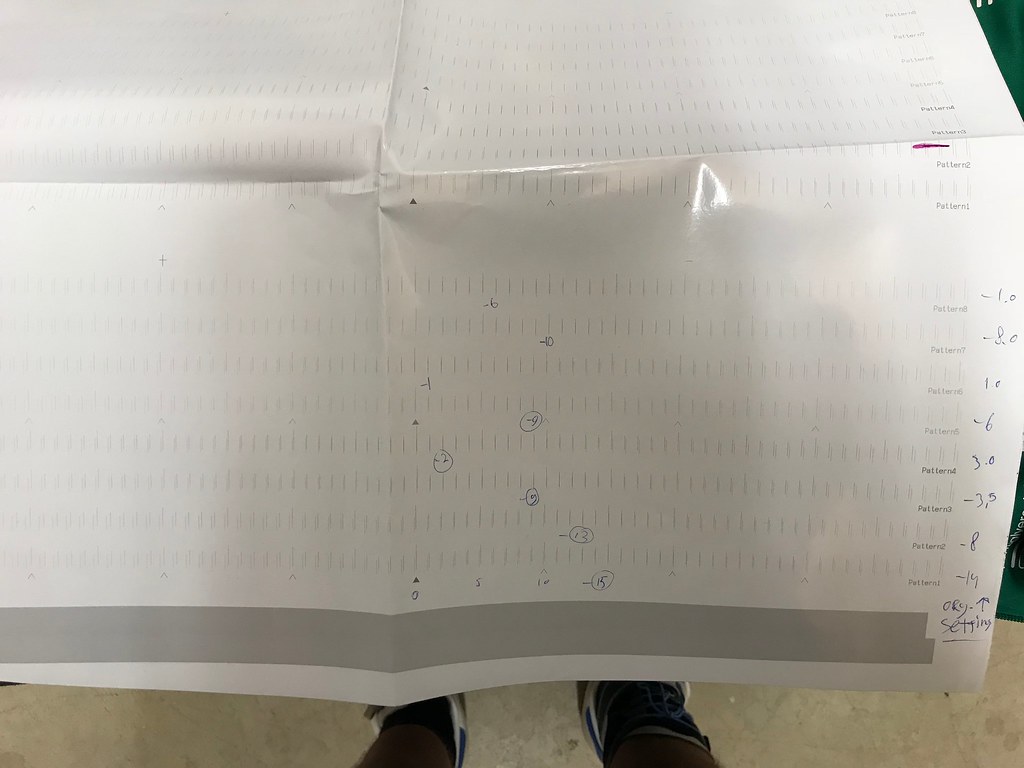 IMG_7448
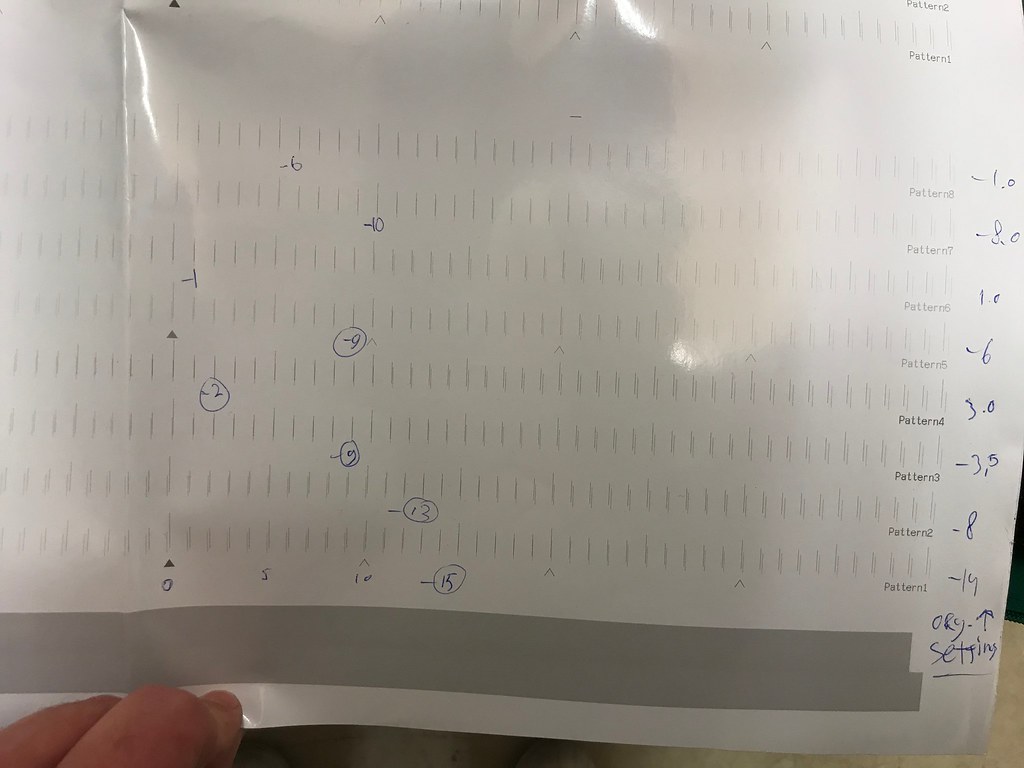 IMG_1307
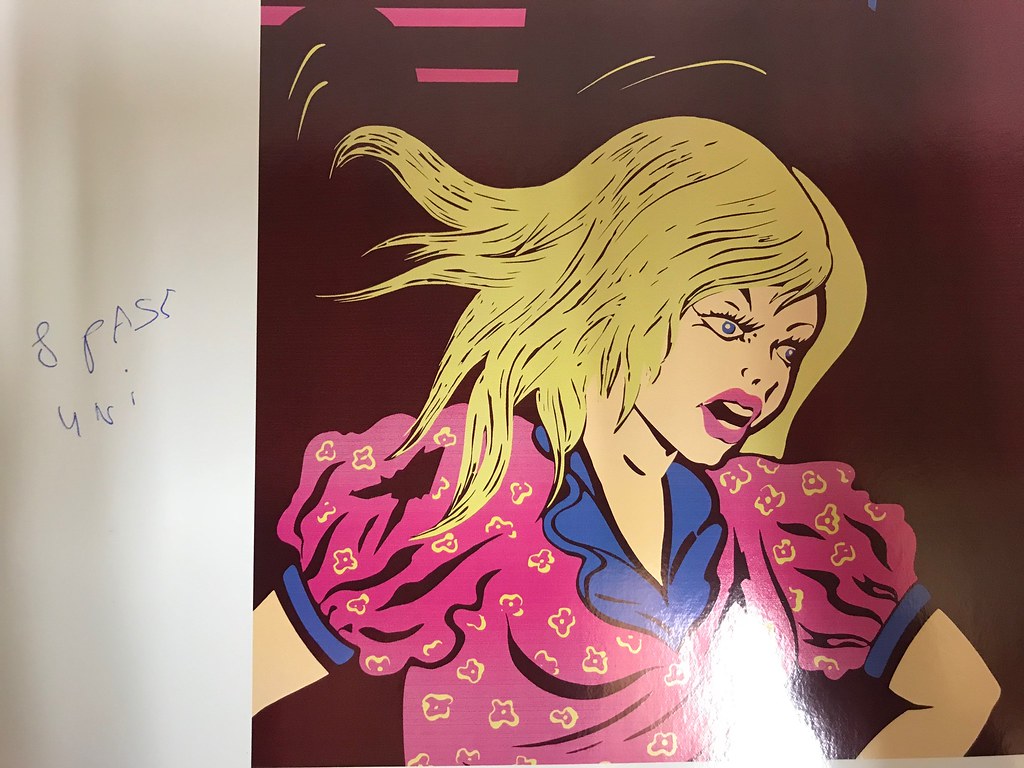 IMG_8192
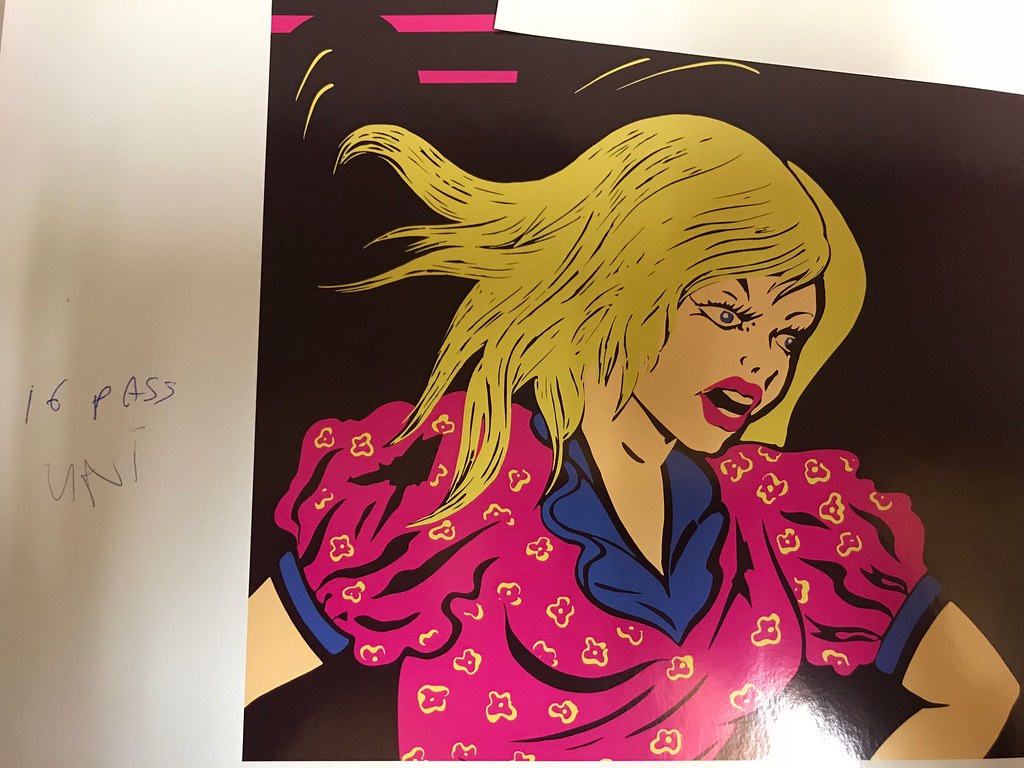 IMG_2139
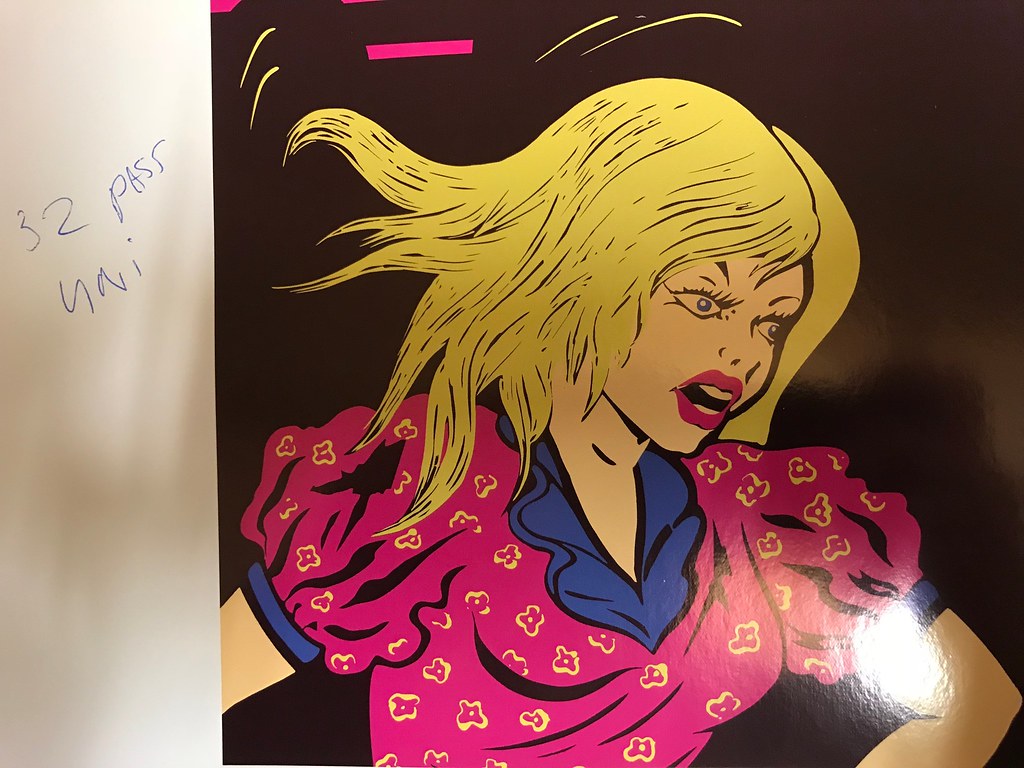 IMG_7272
 IMG_3467
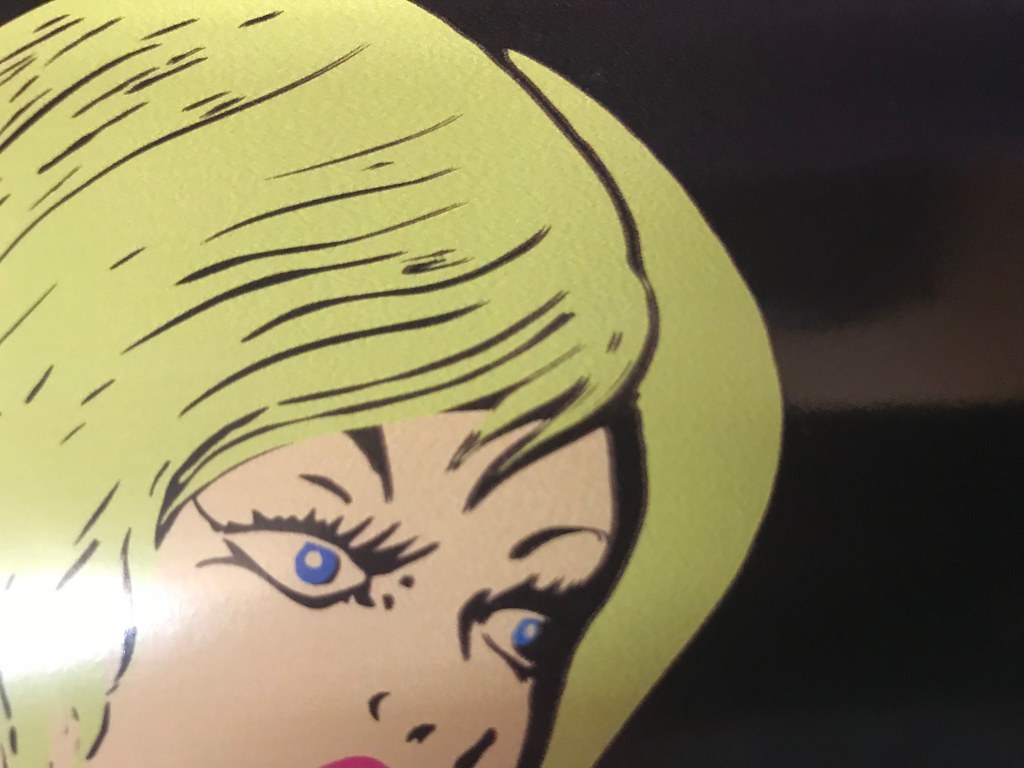 IMG_9771
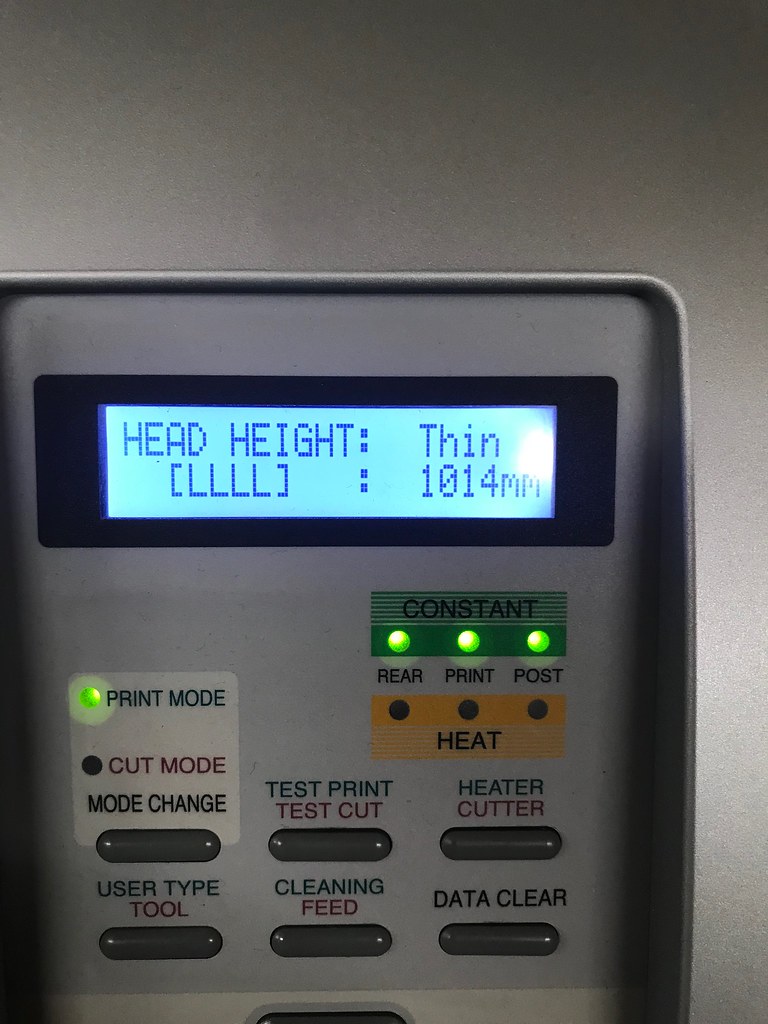 IMG_4083
 IMG_0713
