• I want to thank all the members that have upgraded your accounts. I truly appreciate your support of the site monetarily. Supporting the site keeps this site up and running as a lot of work daily goes on behind the scenes. Click to Support Signs101 ...

Applying graphics to 4x8 sheet by ones self

trakers

New Member
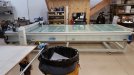
Got in a situation where I needed to complete a dozen 48x96 fully coverage graphics on PolyMetal by myself. I got it done, but man it sucked. Prints were laminated 3M Print Film 40C.

I used a large Big Squeegee, but that was less than ideal. Since it is an air egrees film, I was able to work the air out, but it took forever and wanted to bunch at the ends/corners.

Do you ever do 48x96 installs by yourself and if so, what is your technique?
 

dypinc

New Member
You need a laminator. Roll to roll or flatbed. Flatbed you would have to one at a time which can also be done with roll to roll, but with roll to roll you can print stopping marks all to roll and load on laminator, release liner to take up and continually feed your 4 x 8 substrate. Alignment will probably be more accurate one at a time but with guides continuous feed can be pretty accurate as well. If the panels need to butt and line up I would do one at a time. I wouldn't try doing that without a laminator.
 

tim99

New Member
+1 on the laminator..although if your like us and don't have a laminator that size. i would hinge it and do a 2' section on one side then slowly work my way to the other side using a normal squeegee. the big squeegee is nice but it does leave alot of bubbles if you cant apply the correct pressure.

on a side note these are cheap, I been debating on buying one for a while now and most likely will here shortly just for mounting purposes.
51In Cold Laminator Manual Roll Laminator Vinyl Photo Film Laminating Machine | eBay
 

trakers

New Member
Good tips guys. We do have a 65" laminator, didn't even think of that.
I would like to be able to do it manually as well, so I'll give that a shot.
Like was mentioned, especially by yourself, it is very difficult to apply even pressure with that wide of a BS.
 

Christian @ 2CT Media

Active Member
After years of manual install, this is how we do them now... best investment so far.

On the cheap we used to use a OrangeA Laminator 51" Manual and made a stand to sit between 2 4' Long tables.
 

Attachments

  • image-20161216_123446.jpg
    image-20161216_123446.jpg
    54.2 KB · Views: 666
1. Laminator, as everyone else has said.
2. Big Squeegie, but tape the print to an old core. Dale from Big Squeegee has the video below on how to do on Youtube.
3. What Morph said.


[video=youtube;3TJR6Dr5DHc]https://www.youtube.com/watch?v=3TJR6Dr5DHc[/video]
 

Bigdawg

Just Me
Felt squeegee, hinge the material half way and score the backer from the middle, unroll the backer in small increments as you squeegee along, we do 4x8 manual application in under 10 minutes,
it's good to know how to apply manually, you can't apply window graphics with laminator...

I think it's a matter of convenience, not skill for most of us...
 

TXFB.INS

New Member
use a laminator if you have it.

a trick we found for the Big Squeegee is to fill a 54" core with small rocks, got ours from the dollar store since they were already clean, seal teh edges very good and then place that in the craddle area.
This ensures that even pressure is applied while pushing
 

ThatGuy

New Member
+1 for the laminator. We always had a cheap chinese laminator for just this purpose. We use a laminating table now.
 
use a laminator if you have it.

a trick we found for the Big Squeegee is to fill a 54" core with small rocks, got ours from the dollar store since they were already clean, seal teh edges very good and then place that in the craddle area.
This ensures that even pressure is applied while pushing

Hmm. If I ever have to use that method again, I may get a pvc pipe and try that.
 

Morph1

Print all
I think it's a matter of convenience, not skill for most of us...

agreed, just some of us when start off can not afford that kind of convenience.
Just out of curiosity, would you dry apply clear printed vinyl onto a clear acrylic with laminator ? for some reason I'm always skeptical if I'll get the same quality application using laminator as if I wet applied with squeegee...
I recently had a job that called for that kind of application and I was considering the laminator application, I was under short deadline and kind of felt uneasy running it through the laminator and did it manually ...
It was a 4ft x 6ft - 1/4" acrylic, anyone
 

TheSnowman

New Member
I'm in this boat a lot lately as we've picked up a new auction company and all they do is farm land, and 4X8's, so we'll do 2-3 of these per auction, double sided. What I've started doing (we manually laminate with the BS as well) is I'll cut a small slice out of the liner on the back with my YelloTools Bodyguard Knife, stick down a center channel just by running my finger up and down it, then I only have to lay down two 4X4 prints on each side. Leaves way less chance of skewing, and you don't have as much static buildup when you're release liner rolls up.

I do this with cheap 3621 oracal, and rarely get any air trapped under it. The key is being on a flat surface when you do anything with the Big Squeegee.
 

Bigdawg

Just Me
agreed, just some of us when start off can not afford that kind of convenience.
Just out of curiosity, would you dry apply clear printed vinyl onto a clear acrylic with laminator ? for some reason I'm always skeptical if I'll get the same quality application using laminator as if I wet applied with squeegee...
I recently had a job that called for that kind of application and I was considering the laminator application, I was under short deadline and kind of felt uneasy running it through the laminator and did it manually ...
It was a 4ft x 6ft - 1/4" acrylic, anyone

At that size we probably would have run it through the laminator. But we don't do a lot of clear prints mounted on clear acrylic. We do use if for second surface clear acrylic though, and it works great.
 

Morph1

Print all
right on , I'm gonna have to try that, thx

At that size we probably would have run it through the laminator. But we don't do a lot of clear prints mounted on clear acrylic. We do use if for second surface clear acrylic though, and it works great.
 

ThatGuy

New Member
We just finished this 12' x 4' cabinet. It has a printed graphic on Avery 2050 Translucent mounted 1st surface and it has a reverse image printed on clear mounted 2nd surface. We used our laminating table. The only problem with mounting the clear using dry method is when the printed side of the clear is sliding across itself while applying. It tends to be sticky. We use a used backer paper between the surfaces and it slides with ease.

20170118_121450.jpg
 
Top