• I want to thank all the members that have upgraded your accounts. I truly appreciate your support of the site monetarily. Supporting the site keeps this site up and running as a lot of work daily goes on behind the scenes. Click to Support Signs101 ...

Die cutting graphics with application tape applied

Mata

New Member
Hi

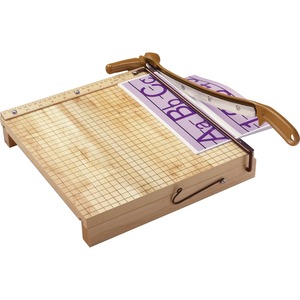
I have a regular order of single colour vinyl stickers (black) that need application tape applied, I then need to supply these individually cut and sent to the customer. In the past I have been cutting the graphics on the vinyl cutter, weeding the excess, applying app tape and then cutting the stickers out manually into squares using a ruler and a knife.

I would like to cut out the manual part and get the cutter to do it, does anyone have a good suggestion on how this can be achieved?

I'm thinking, cut the graphics as normal, apply the app tape, put it back through the cutter then let it die cut my grid pattern for me. The issue I feel will arise is lining the media on the cutter so it cuts where I need.

Does anyone do this and can help?

I'm using a Summa S2 120T and Summa GoSign
 

balstestrat

Problem Solver
Haven't played with GoSign but I wonder if you could add OPOS marks, cut them and then read them on 2nd pass.
I don't see why not.

Only limitation is your transfer must be see through (or don't apply it on top of the marks).
 
Last edited:

Mata

New Member
I'll give that a go.

I don't technically know how they work but do they crop marks have to be black? The reason I ask is I have another job and the vinyl's green, if what you're suggesting works, I would like to use it on the other job.
 

balstestrat

Problem Solver
I'll give that a go.

I don't technically know how they work but do they crop marks have to be black? The reason I ask is I have another job and the vinyl's green, if what you're suggesting works, I would like to use it on the other job.
Yeah it needs to be black. You can always try to calibrate the material and see if the OPOS accepts green but I doubt it.
But if you cut those black round marks and change the green ones to the black ones you can still do a job here and there. If you just add corner marks and lets say not 20 marks.


And you know if you have some space to play around and the Flexcut doesn't need to be so accurate, add some mark to the right or left side where you position the material. Then match the front of the piece to some position at the front side of the cutter.
You can get it close enough to the same position this way. Just need to make sure it's going straight.
 
Last edited:

Mata

New Member
Only a 1000 at a time, I'm just trying to be more productive as I am on my own so if there is anything i can do to save me an hour then great
 

Gino

Premium Subscriber
We have 5 guillotine cutters. 36", 30", 24" 14" and a small one for small things. You can cut multiples and at 1,000 pieces, if you set it up right, you'd probably have them all cut in about 1/2 hour, once you get rolling. However, you need to know what your biggest side will be and get one accordingly.

1010067315.jpg
 

Mata

New Member
Now thats what I am talking about. How did you line it back up once you applied the tape or did you leave it in position, apply the tape and then recut?
 

AGCharlotte

New Member
we've been doing them like jasonx as well, weeding out the camera marks prior to cutting. Just need to make sure the mask sticks down good in the corners on the master sheet.
 

Mata

New Member
I seriously tried this for ages and couldn't work out how to cut the registration marks.

I created my file within Illustrator (mac) and added the OPUS XY registration marks using the plugin. I then send it to Windows and open it up in GoSign. GoSign see's the registration marks but rather than cut them, it wants to read them so how do I get it to cut them instead?
 

TrustMoore_TN

Sign & Graphics Business Consultant
Haven't played with GoSign but I wonder if you could add OPOS marks, cut them and then read them on 2nd pass.
I don't see why not.

Only limitation is your transfer must be see through (or don't apply it on top of the marks).
He could cut through the transfer tape and remove what covering the reg marks... Just a thought. Haven't tried it.
 

Joseph44708

I Drink And I Know Things
This is how I do it in flexi, weather it is an individual job or multiples.
Set up design with two cuts.
1st cut is the kiss cut the 2nd is the final cut.
Print job, next day I set up job on cutter, open job in production manager, shut off final cut and just send the 1st cut through. After 1st cut is complete I weed the job but LEAVE THE CROP MARKS.
Then apply the application tape (I use clear).
Set job back onto cutter, then from production manager turn off 1st cut and turn on 2nd cut and send. JOB IS DONE
 

WYLDGFI

Merchant Member
We would do this on our Colex if needed. The camera marks can be uncovered and the tape cut thru with ease or we use a clear plastic and that allows the cam marks to be read thru it. I wouldn't attempt on a standard plotter.
 

Jester1167

Premium Subscriber
We always outsourced large quantities like this unless we weren't busy.

I always give the company buying the decals pricing above and below their range requested (10,000, 5,000, 1,000, 500). It's like a force multiplier and they can often save money. You get to do fun projects that are more profitable while a company set up to do this can crank it out in hours on expensive machines.

Be aware that processes like these have a 10% over and under run policy and you will be charged based on the quantity shipped. Look at the packing slip and charge your customer accordingly.
 

Adhoore

New Member
I seriously tried this for ages and couldn't work out how to cut the registration marks.

I created my file within Illustrator (mac) and added the OPUS XY registration marks using the plugin. I then send it to Windows and open it up in GoSign. GoSign see's the registration marks but rather than cut them, it wants to read them so how do I get it to cut them instead?

When you open it up in GoSign are you using "Import file"? Because that will try to detect the marks by default. You can disable marker detection by editing the action set behind "Import file". Like this:

edit-import-file.png


I know it's not much, but this video shows a little bit of the action sets:
 
Top