• I want to thank all the members that have upgraded your accounts. I truly appreciate your support of the site monetarily. Supporting the site keeps this site up and running as a lot of work daily goes on behind the scenes. Click to Support Signs101 ...

How to get design on window perf to not arc after install

ScottyAdams

New Member
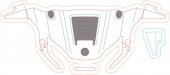
So we've only done a few designs on window perf. Most have been pretty much flat windows. We recently did a back window on one of the prius models that had quite a concave to it. After install the text was no longer in a straight line and had an arc to it. The customer was luckily ok with it...however, we would like to figure out what the best way to get around this is or to compensate for this in the future. What do you guys do to avoid this problem. Thanks for any help....always much appreciated.
 

Jillbeans

New Member
When doing vehicle window lettering in vinyl (back in the day) I always distorted the overall shape of the word until it was like a gentle "smile", so that it did not frown once applied...and neither did the customer.
Love....Jill
 

Billct2

Active Member
When I want it to be perfect I take the measurements arc to match, do a paper proof and adjust as needed
 

Jeff

New Member
I hope this makes sense.

Window arc jpeg.jpg

I either use one of the defroster lines or measure down from the top on both sides where the black line is in this diagram to determine what is straight.

I lay a 6ft straight edge / ruler on the widow. (It will take the same arc as the copy would if applied from its original straight layout)

I measure where the red arrow is.

I make a box (red) at the bottom of the copy to whatever that measurement was.

I distort the copy so the outer bottom edges of the copy are at the top of that red box.

Now when you apply it, it will layout / look straight.

This works for cut vinyl. I believe I have done it for printed as well.

There may be a better way, but this has worked well for me.
 

TXFB.INS

New Member
I hope this makes sense.

View attachment 102041

I either use one of the defroster lines or measure down from the top on both sides where the black line is in this diagram to determine what is straight.

I lay a 6ft straight edge / ruler on the widow. (It will take the same arc as the copy would if applied from its original straight layout)

I measure where the red arrow is.

I make a box (red) at the bottom of the copy to whatever that measurement was.

I distort the copy so the outer bottom edges of the copy are at the top of that red box.

Now when you apply it, it will layout / look straight.

This works for cut vinyl. I believe I have done it for printed as well.

There may be a better way, but this has worked well for me.

this,
if you want no arch then you will have to measure the exact window figure the curve and then adjust with the design before fabrication.

as fa as window perf goes RARELY do you do this since perf is a full window coverage and there is typically full color design
 

bob

It's better to have two hands than one glove.
There are lot's of ways to flatten a mildly three dimensional object**, like an auto rear window, into two-space. The easiest is to tape a piece of paper to it, trace it with a sharpie, place it on a flat surface, take a picture of it, import that into whatever software you're using, and scale it to full size. If you draw a straight line across the pattern when you trace it [somewhere in the vicinity of where the vinyl's going], when flattened that straight line will now represent the curve you need for the vinyl to appear straight when it's applied to then window.

The next easiest way requires an advanced degree on topological mathematics.

** Some massively thee dimensional objects cannot be flattened. Like a hat for example.
 

neil_se

New Member
After so many problems with rear windows over the years we now do it exactly as Bob describes. It takes extra time but guarantees a great result and less redos. Luckily we have a latex printer so can trace, adjust artwork, print and fit in a short time frame.
 

jfiscus

Rap Master
RE; Tracing a 3D object into a flat 2-D piece:
I really like using phototex for this, as it does not stretch and sticks well. I take the piece and place it onto the surface, trim it a bit, and then trace any ridges and edges with a grease pencil and then take it back off of the surface and reapply it to the backing paper. Then I hang it on the wall and take a good straight-on photo of it and trace it in Illustrator and scale it to size.
 

Attachments

  • step1.jpg
    step1.jpg
    55.6 KB · Views: 110
  • step3.jpg
    step3.jpg
    33.1 KB · Views: 109
  • step4.jpg
    step4.jpg
    30.6 KB · Views: 100
Top