• I want to thank all the members that have upgraded your accounts. I truly appreciate your support of the site monetarily. Supporting the site keeps this site up and running as a lot of work daily goes on behind the scenes. Click to Support Signs101 ...

HP Latex 110 - Heat Airflow Pressure

RandyDe

New Member
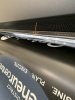
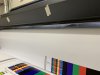
I've been having difficulties printing to this machine for a while. I've been researching all options, have changed media's etc. Looking at settings and does anybody have knowledge about adjusting Heat Airflow Pressure? I do notice that most of my media profiles are at 175 mmH2O.

What does this setting do? How could it affect my prints?
 

Attachments

  • IMG_3335.jpg
    IMG_3335.jpg
    1.9 MB · Views: 365

Dan360

New Member
I believe it just makes the fans spin faster or slower to kick the heat down in the curing area from the heaters. Helps with warping media from too much heat or ink not curing from too little. Though that's like the one setting I've never touched, usually I just increase or decrease the temp.
 

RandyDe

New Member
I believe it just makes the fans spin faster or slower to kick the heat down in the curing area from the heaters. Helps with warping media from too much heat or ink not curing from too little. Though that's like the one setting I've never touched, usually I just increase or decrease the temp.

I haven't adjusted this either. I just ran a banner and increased it from 175 to 200, I can't really notice a difference yet. The media still bumps up in the same area which leaves a dull area in the finish.
 

greysquirrel

New Member
So with 16pass, the printer crawls. You may actually be able to lower heater even still. 2-3 degrees makes a huge difference with certain medias. Are you running adhesive vinyl with 380% ink? That could be too much saturation. Usually on backlit prints, I'm at 150%. I make my own black at 100/30/30/30 with no issues of light on backlit.
 

RandyDe

New Member
So with 16pass, the printer crawls. You may actually be able to lower heater even still. 2-3 degrees makes a huge difference with certain medias. Are you running adhesive vinyl with 380% ink? That could be too much saturation. Usually on backlit prints, I'm at 150%. I make my own black at 100/30/30/30 with no issues of light on backlit.

It is pretty darn slow. I only run the 380% on the PET film as it seems to carry the load. On vinyl I have it backed off to about 200%, 12-pass. We put a heat laser on the media as it was coming out of the printer and noticed a wide spread of heat. In the hottest spots the media was at about 65%C and in the cooler areas about 39%C. This printer is 55" wide and there seems to be 2 hot areas each in 1/3 from the side edges.
 

greysquirrel

New Member
I have never seen a reason to use any more than 110% on any vinyl. You may be putting too much ink down and its causing a buckle when curing. Back off density and run another print. As long as you create a profile from that density you should be happy with color.
 

ikarasu

Active Member
Buy a wire brush from the dollar store and scrape all the holes from the curing module.

They get clogged with vapors / ink and that's the #1 reason for carrying Temps across your bed. We had a bunch of spots on ours that wasn't curing... The wire brush did the trick.
 

RandyDe

New Member
I have never seen a reason to use any more than 110% on any vinyl. You may be putting too much ink down and its causing a buckle when curing. Back off density and run another print. As long as you create a profile from that density you should be happy with color.

I think you've misunderstood what I tried to communicate. On the HP I do test to limit my ink with the built in method which usually is around 80 to100%. Then I often will further ink limit when I linearize further in my rip software. The rips software refers to total ink limits in cmyk 400%... I further ink limit at that stage 385% sometimes more sometimes less. Biggest issue I'm noticing is un-even heat across the width of the printer.
 

RandyDe

New Member
Buy a wire brush from the dollar store and scrape all the holes from the curing module.

They get clogged with vapors / ink and that's the #1 reason for carrying Temps across your bed. We had a bunch of spots on ours that wasn't curing... The wire brush did the trick.

I've had these thoughts but there was a comment from our reseller/service provider that mentioned that, quote: "Judging by the pictures, it looks like there isn’t enough heat getting the that one spot. This is most likely due to dust etc trapped inside the curing module. The only way to fully clean it out is to remove the entire module and then remove the heaters and the clean it out. Unless you know what you’re doing, I don’t advise you do this yourself.".

Here is a photo of a different media. A brand new roll of Drytac Polar Premium Matte Vinyl that I was loading and starting to calibrate yesterday. Heat is set at 100°C, ink limit was good at 110% but I've opted to back it to 90% on the printer to save a few bucks on ink. Note the two raised bumps under the dryer. Those bumps are the areas that are the warmest when media comes out of the exit. By laser thermometer they're about 65-70C and when I measure on areas away from those to spots it ranges from 45-55C.
 

Attachments

  • IMG_3352.jpg
    IMG_3352.jpg
    1.4 MB · Views: 261
Last edited:

Dan360

New Member
Yup, uneven heat. It's not that bad getting in there, right & left cover, pressure sensor, top cover and then heaters removed in that order. You don't need to remove the entire heating module.
 

RandyDe

New Member
Yup, uneven heat. It's not that bad getting in there, right & left cover, pressure sensor, top cover and then heaters removed in that order. You don't need to remove the entire heating module.

It's beyond frustrating and we've essentially had this issue since day-1 with this printer. And we bought it brand new out of the box but it was sitting in the resellers warehouse for years in original HP crates and packaging. I'm trying to find a how-to video or book on how to do this.
 

greysquirrel

New Member
Its a PM service when this is cleaned. The whole heater assembly has to be removed. Its not worth messing it up. Call in a tech. It should take them 2 hours.
 
Top