Dennis422
New Member
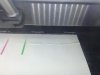
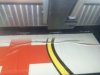
Printed a wall material (Fathead style) in my L25500 yesterday and had quite a few issues with it.
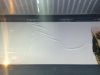
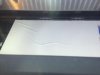
In the middle of the print I would get wrinkles at the edges of the film. It even damaged one of my printheads on Friday evening. Printhead got caught up at the wrinkle and that ripped the bottom plastic (that has wiring running through it) at the bottom of the printhead.
I know that there are issues with the heating of the film at the first 2-3 feet of the print, I usually put colored lines at the beginning to eliminate that before the real printing starts. But, I was getting these wrinkles even after 6-7 feet of printing.
I started with a regular setting of 55-110 C and 30% airflow. Later I lowered down to 50-110 C and increased the airflow to 45%.
Anyone has any idea why is this happening?
Thanks