• I want to thank all the members that have upgraded your accounts. I truly appreciate your support of the site monetarily. Supporting the site keeps this site up and running as a lot of work daily goes on behind the scenes. Click to Support Signs101 ...

Mimaki JV3 Head Alignment

WrapperX

New Member
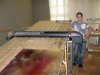
So you use the air flow of the "air hockey" tables to make the material "lite" enough to move through the pinch roller advance. How exactly did you go about creating this use of the printer?? This obviously isn't a factory recomended use of the machine...did you like the way it printed and just figured out a way to make it work for your needs??

Your creative genius never ceases to impress me. :notworthy:
 

Gabriel

New Member
:)

I have a pdf. file for JV3 Series-Head Replacement Procedure. Interested.... someone? Maybe this will help you!
 

artbot

New Member
thanks, but it's not that impressive. my life is insane...all the innovation doesn't convert to higher margins... just maybe more fun.

i've been printing on flat material for about ten years. fj50, encad cadjet, encad 505, mimaki 160sp.

check out this pic of an encad with a 16' downhill feed table (covered with hundreds of matchbox car wheels!)

right now i'm replumbing the printer with a cleaning system because i don't print that often. it will also alow me to run white, clear, and silver at double cmyk speed. the black head will have a removable ink caddy that i can fill with silver or whatever, just enough to do the run as i go. when done replug in the double black line and i'm back to double cmyk. and when not printing i can put the cmyk on stand by and instantly run cleaning solution to the heads. right not mimaki over prints from the special channel. so even though it's got both sides of the head dedicated to white it runs at single head speed. grrr.
 

Attachments

  • l.jpg
    l.jpg
    36.7 KB · Views: 200

WrapperX

New Member
Well your life maybe insane, but your work is well crafted and greatly admired by many I'm sure. As for "higher margins", well, I can't imagine all that time and effort into print inovations can be dumped onto customers - after all...You are the one promising the cool affects and surface prints. They are just taking advantage of your brilliant ideas in utilizing your printers to their absolute maximum capabilities.

The real questions is where do you come up with these contraption concepts to make it come together?? That's where the real genius is hiding. :thumb:
 

artbot

New Member
as far as coming up with stuff... most of the credit goes to being manic... if done right, the fine art market can make you a lot of money. i've been hiding from it for abou the last five years trying to re-enter with something that can't easily be reverse engineered/copied. in the art world there is usually one creative idea for every 50 copy cat artists. i want the copy cats to look at the work and think "what tha'...?"
 

WrapperX

New Member
Well I would say you are on your way - so far you are the only one I've heard of using Solvent vinyl printers for Fine Art.

As for copy cats - unfortunately they will always be out there. But even the copy cats are never AS good as the original. And they know that, and true Art apprciators know that as well.
 

Robert M

New Member
Petg

Artbot, at Roland tech training we were told to do our test prints on petg, high gloss white. It is pricey stuff but the ink drops lay down without much gain making for better alignment
 

artbot

New Member
this is the 4x8 petg (.060). a guy at mountain graphics has some throw away rolls of semi gloss paper that i'm gonna swipe next time i'm in houston. hope all is well with my printer as i'm putting it back together.
 

smdgrfx

New Member
artbot, sorry it has taken so long to get back to you. send me a pm if you need some help with manuals/files/whatever. I am in Houston, close to mountain graphics. Next time you are in town, look me up.
 

LMHConcepts

New Member
Sorry for hijacking such an old thread but I replaced my head and am having the same problem. I did all the alignement things that you can do by hand, but when I do a test print I come up with this:
IMG_20140820_160930_419.jpg
As you can see, the yellow/cyan is moved over a bit and is printing after where it should. Is there a way to adjust the printhead on the mimaki to make it fire a bit earlier?
 
Top