• I want to thank all the members that have upgraded your accounts. I truly appreciate your support of the site monetarily. Supporting the site keeps this site up and running as a lot of work daily goes on behind the scenes. Click to Support Signs101 ...

Please help! wrap print distorted (puckered?) prior to laminating

ibikestickers

New Member
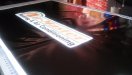
Hi all, I tried to search to find something like my problem, but couldn't find it. I've got a problem with 5 panels of print on 3M IJ180CV3. I printed them, then left them standing on end in a loose coil to dry, and I guess I had a space heater too close to them and now they're all distorted. Any suggestions on how to fix them? I tried to laminate one and had a terrible outcome with large channels of air trapped between the laminate and the print. Thanks for the help.
attachment.php
 

Attachments

  • distorted print.jpg
    distorted print.jpg
    41.9 KB · Views: 137

shoresigns

New Member
Does it have a paper liner? This is just the first crazy idea that popped into my head, but the paper liner is going to hold its distorted shape as long as the vinyl is attached to it, right? Maybe you could detach the distorted half from its liner and then lay it back onto the liner with the help of a squeegee or laminator, taking care not to damage the print. Then if it looks significantly flatter than before, try laminating it.
 

mpn

New Member
Reprint it is my suggestion. Looks like the space heater sped up the drying process too much? Why fight it and find out it won't line up down the line?
 

CES020

New Member
Maybe try a heat gun to see if it makes it flatten back out? I doubt it will, but it's worth a try. The heater probably got it back the point where it's memory is broken, so it's new shape is probably what you're seeing, but I'd try it before I started over.
 

reQ

New Member
Reprint it is my suggestion. Looks like the space heater sped up the drying process too much? Why fight it and find out it won't line up down the line?
Thats what i would do. Save yourself time & extra headache and just reprint, which won't cost to much anyways.
 

Bly

New Member
Try misting some water onto the back of the liner and letting it dry out again flat on the bench.
It's the liner that's distorted - not the vinyl.
 

player

New Member
If you are going to reprint it... Put it in your laminator. Peal it back, holding the printed decal around the top roller, and pull on the print slightly to keep it even and flat against the rollers.
Run the laminator to pair the decal back onto the backer.

If this fails, reprint...
 

GAC05

Quit buggin' me
If all else fails you can apply the lam wet over the graphic.
Just have to keep the water from wicking under the edges and causing the backer to stick to the adhesive side.
Not really recommended but it works, had to do this on a regular basis before our laminator showed up.

wayne k
guam usa
 

reQ

New Member
If all else fails you can apply the lam wet over the graphic.
Just have to keep the water from wicking under the edges and causing the backer to stick to the adhesive side.
Not really recommended but it works, had to do this on a regular basis before our laminator showed up.

wayne k
guam usa

I thought i was only crazy one who is doing it :D
 

AF

New Member
I could be that the moisture content of the paper liner is not even. Letting the print stabilize for a day could improve things, or roll it up on a core and leave it for a few hours to see if it goes back to normal.
 

Jester1167

Premium Subscriber
My guess is it is a combination of the oversaturated black and the non-saturated white area. The solvent ink makes the vinyl swell. You can confirm this yourself a couple of ways; cut open an old cartridge and put several drops of ink on some scrap vinyl, and/or print a dark background with white lettering. Let the prints dry for days then remove the backing print side down. You will be able to see the unprinted area even from the adhesive side.

If your problems had something to do with the space heater, the problem would have been more drastic towards the outside of the roll. From the image posted it looks like it is in the middle.

You said you had it loosely rolled, maybe that area was touching and didn't get as much airflow? Try and let it gas out another 24 hours?

If you have to reprint, try changing your spot black to C60 M60 Y0 K100. That way you will only be putting down 220% ink for a deep rich black. If that corrects the problem then you need to check the ink limits on your profiles. I am not positive but I think I remember the max ink limits should be 280% or below.
 

ibikestickers

New Member
Well, I did what a couple of others suggested and wet-laminated. It worked really well, just had to work quick!

Hopefully, it will prove to be durable!

Thanks for the help to everyone, too!
 
We have a heat lamp above our laminating table. Like you would on your back porch. Sometimes the edges curl up on some different media or laminate. We let it sit under the heater for 30 mins or so and it's perfectly flat when we come back. I don't know if they are too far gone already or not though.
 

brycesteiner

New Member
If all else fails you can apply the lam wet over the graphic.
Just have to keep the water from wicking under the edges and causing the backer to stick to the adhesive side.
Not really recommended but it works, had to do this on a regular basis before our laminator showed up.

wayne k
guam usa

I thought i was only crazy one who is doing it :D

How exactly does one do wet lamination especially that large? I tried googling it but nothing is coming up.
 

reQ

New Member
Oh boyyyyy where do i start lol. Mixing baby shampoo solution with warm water, tape your print's edges all the way around (not a must, but some liners will soak like crazy and your print might get screwed unless you wait until it completely dries). Spray your laminate, spray your print, flip it, squeegee the fluid out (bluemax tinting squeegee works awesome for that lol) Wipe all the water before your print is completely soaked, and let it dry.
This method is very messy, but gets the job done. Biggest print i ever did that way was 4x14 ft. And keep in mind, that after you will put laminate on print, you have to work fast, since it dries and stick to the print if you will let it sit like that.

P.S. If you DON'T have any other option, this is the option, but i would not recommend it lol
 

MikePro

New Member
maybe just try "stretching" it prior to lamination?

worth a shot to:
-wind it up on a cardboard-roll/tube, graphic-side out, and tighten as much as possible
....maybe even wand it with a little heatgun for some extra help, but mainly can just let it sit like that overnight.
-when you laminate the graphic, try to keep tension on it against the web, helping to hold it flat while giving a bit of outward tension/smoothing.
I use lint-free gloves a lot for laminating, which helps for this.

any silvering that may still find its way into the lamination, can most likely be dealt with care/heat during install.
i mean, reprinting is definitely an option BUT with 5, well 4, panels of printed material at stake here... might not hurt to give it a shot on one more before giving-in.
 
Top