• I want to thank all the members that have upgraded your accounts. I truly appreciate your support of the site monetarily. Supporting the site keeps this site up and running as a lot of work daily goes on behind the scenes. Click to Support Signs101 ...

Quill ADA Braille

CanuckSigns

Active Member
Does anyone on here run the Quill ADA braille printer? If so would you mind sending me a message I have a few questions and want to see if anyone else is having similar issues to us and if they have found a solution.

Cheers!
 

VCastaneda

New Member
Does anyone on here run the Quill ADA braille printer? If so would you mind sending me a message I have a few questions and want to see if anyone else is having similar issues to us and if they have found a solution.

Cheers!
Howdy,

I hope you don't mind if I piggyback off of your post. We recently purchased one and are having problem doing the route after doing the braille. I noticed the braille is to low after I applied the applique, there is not much spacing between them. So, does anyone know how to apply the braille and then route the sign? I attached a picture of the issue. Thanks!
 

Attachments

  • 20251119_140103.jpg
    20251119_140103.jpg
    1.1 MB · Views: 75

CanuckSigns

Active Member
Howdy,

I hope you don't mind if I piggyback off of your post. We recently purchased one and are having problem doing the route after doing the braille. I noticed the braille is to low after I applied the applique, there is not much spacing between them. So, does anyone know how to apply the braille and then route the sign? I attached a picture of the issue. Thanks!
Our process is always to apply the tactile applique, then apply the braille, why would you apply the braille first?
 

VCastaneda

New Member
Our process is always to apply the tactile applique, then apply the braille, why would you apply the braille first?
We saw on different videos that they do the braille first, applique second and route out signs last. Like I said we just got the Quill and are trying to figure it out. We want to do the braille first and then route out the signs, just can't figure out how to do that.
 

CanuckSigns

Active Member
I'm a bit confused to your process, here is a rough breakdown of our steps
1) cut the backer panel to final size
2) cut a piece of applique slightly larger than needed and apply it to the backer panel
3) laser cut the applique, clean smoke & haze with alcohol
4) remove the excess applique (careful not to leave it sitting too long or you will have issues with tape boogers being left on the sign)
5) apply braille to sign, tape the back, package.
it's a fairly efficient system, we regularly do 200 ADA stairwell signs a day with this process
 
  • Agree
Reactions: 1 user

VCastaneda

New Member
Our process before the Quill:

1) Laser cut back panel to final size
2) Drill braille dots
3) Apply braille beads
4) Remove sign & apply laser cut applique
5) Apply tape to back and package.

* Note: While the braille is being applied, I am laser cutting the applique so there is less time the CNC router is being tied up. This process is quicker since we have someone doing the braille and someone else is applying the applique.
 

CanuckSigns

Active Member
Our process before the Quill:

1) Laser cut back panel to final size
2) Drill braille dots
3) Apply braille beads
4) Remove sign & apply laser cut applique
5) Apply tape to back and package.

* Note: While the braille is being applied, I am laser cutting the applique so there is less time the CNC router is being tied up. This process is quicker since we have someone doing the braille and someone else is applying the applique.
so you apply the tactile letters one at a time?
 

VCastaneda

New Member
Lol no. When the laser is done cutting the applique, I put making tape over everything that was cut. I peel the backing off and apply it to the back panel. I attached a picture of how I align it to the sign as well.
 

Attachments

  • 20251119_151622.jpg
    20251119_151622.jpg
    1.4 MB · Views: 73
  • Agree
Reactions: 2 users

JBurton

Signtologist
The fact that y'all apply cut out letters baffles me. I mean 200 a day is good speed, but I'd hate to measure and place little ada signs, not to mention removing all the bits of backing and face film. Applying and routing with a poperly measured tool, then removing the excess and popping out inserts makes tons of sense to me.
Further, we would always do the lettering before the braille, as either the applique would possibly overlap the braille, signs could get mixed up, or chips would fill the little braille holes, and if someone mistakenly put in a bead with white under it, it stood out like a sore thumb, the clear beads would hilariously magnify whatever color was behind them.
Anyway, I'm following along out of interest in this product.

 

StarSign

New Member
We also laser cut the tactile and apply after the braille has been inserted. If you set it up right there is no measuring involved.
 

VCastaneda

New Member
The fact that y'all apply cut out letters baffles me. I mean 200 a day is good speed, but I'd hate to measure and place little ada signs, not to mention removing all the bits of backing and face film. Applying and routing with a poperly measured tool, then removing the excess and popping out inserts makes tons of sense to me.
Further, we would always do the lettering before the braille, as either the applique would possibly overlap the braille, signs could get mixed up, or chips would fill the little braille holes, and if someone mistakenly put in a bead with white under it, it stood out like a sore thumb, the clear beads would hilariously magnify whatever color was behind them.
Anyway, I'm following along out of interest in this product.
Well, I was using the Mutoh Xpert 661 to make ADA signs and I loved it. I just had to put the substrate on the table, send the files and it would do everything. Unfortunately, it is out of commission and the company has decided not to fixed it. They want to find a different UV printer in the future so that is why we are doing ADA signs like this.

I agree it would be faster to route the applique but when we do it that way the finished product does not look good. I don't run the CNC router so I couldn't tell you what bit or process is used. That is why we got the Quill, apparently it would be quicker to do braille but we are still trying to figure it out.
 

crashaffinity

New Member
I'm a bit confused to your process, here is a rough breakdown of our steps
1) cut the backer panel to final size
2) cut a piece of applique slightly larger than needed and apply it to the backer panel
3) laser cut the applique, clean smoke & haze with alcohol
4) remove the excess applique (careful not to leave it sitting too long or you will have issues with tape boogers being left on the sign)
5) apply braille to sign, tape the back, package.
it's a fairly efficient system, we regularly do 200 ADA stairwell signs a day with this process
So you laser through the first layer and peel off the rest? curious what adhesive you use. I'm playing around with the method using an engraving tool getting mixed results, but my laser arrives in a couple weeks.
 

TEN

Premium Subscriber
Lol no. When the laser is done cutting the applique, I put making tape over everything that was cut. I peel the backing off and apply it to the back panel. I attached a picture of how I align it to the sign as well.
This is the way we did applique for years before moving to a print system.
 

VCastaneda

New Member
So you laser through the first layer and peel off the rest? curious what adhesive you use. I'm playing around with the method using an engraving tool getting mixed results, but my laser arrives in a couple weeks.
I laser all the way through the applique and then apply masking tape over it. I turn it over, only take off the adhesive backing of the cut out items and apply to to the sign that has the braille. When you apply the cut out applique only the ones that have the adhesive will stay behind when you peel it off.

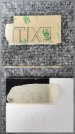
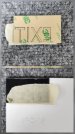
It is a few more steps than just applying it to the substrate and routing it but it does saves ALOT of material. I make it just big enough to clear the text or symbols and align it to the left corner when applying. So, for example if I had 20 4x6 EXIT signs I can cut the letters to a 1.5x3 size instead of applying a applique to cover the whole 4x6 sign. (See attached pic for reference) When I am ready to apply it I align it to the top left corner and it will be exactly where the braille needs to be. I also attached the tape we use, always put it on the back on of the applique before cutting (unless you order it with it applied).
 

Attachments

  • 20251119_151622.jpg
    20251119_151622.jpg
    1.4 MB · Views: 44
  • 3m Tape.JPG
    3m Tape.JPG
    31.4 KB · Views: 40
Last edited:
  • Agree
Reactions: 1 user

crashaffinity

New Member
I laser all the way through the applique and then apply masking tape over it. I turn it over, only take off the adhesive backing of the cut out items and apply to to the sign that has the braille. When you apply the cut out applique only the ones that have the adhesive will stay behind when you peel it off.

It is a few more steps than just applying it to the substrate and routing it but it does saves ALOT of material. I make it just big enough to clear the text or symbols and align it to the left corner when applying. So, for example if I had 20 4x6 EXIT signs I can cut the letters to a 1.5x3 size instead of applying a applique to cover the whole 4x6 sign. (See attached pic for reference) When I am ready to apply it I align it to the top left corner and it will be exactly where the braille needs to be. I also attached the tape we use, always put it on the back on of the applique before cutting (unless you order it with it applied).
I'm going to try your method this weekend i'm also interested in CanuckSigns' method

I have 1200 ada signs to make trying to make for the best workflow
 

JBurton

Signtologist
I noticed the braille is to low after I applied the applique, there is not much spacing between them.

I'm not the ADA police, but the lettering for EXIT in this sign looks too narrow to conform to ada standards. Also the braille is too low, but that's what you're here asking about. Do you have reference material to produce ADA signs to standard?
 

VCastaneda

New Member
I'm not the ADA police, but the lettering for EXIT in this sign looks too narrow to conform to ada standards. Also the braille is too low, but that's what you're here asking about. Do you have reference material to produce ADA signs to standard?
Yes, we do have information on ADA and we do know that the braille is off. That is why I originally asked if anyone is using the Quill because I have a question on how to do the braille first and than route out the sign.
 
Top