• I want to thank all the members that have upgraded your accounts. I truly appreciate your support of the site monetarily. Supporting the site keeps this site up and running as a lot of work daily goes on behind the scenes. Click to Support Signs101 ...

JV33 problem

coreprint

New Member
Hi there, we have no yellow coming through at all.
We have had it before, but a few hard cleans and an ink fill, sorted it.
We have done the same today, but still nothing.
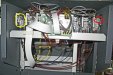
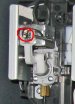
We have noticed there seems to be air in the yellow ink lines, so we tried to draw this out through the damper with a srynge,
but it doesn't seem to draw the ink through, getting rid of the air lock?
Its as though there is a hole in the lines???
or they have lost the a seal?

Any ideas anybody?
 

SightLine

║▌║█║▌│║▌║▌█
Welcome to Signs101. Did you try doing a search on here? First and foremost, JV33, CJV30, JV5 machines use solenoid valves at the cartridges to control ink flow in the ink system. Trying to pull ink through with a syringe without first opening a cartridge valve for that color will not work. You are pulling against a closed line and essentially introducing a massive amount of negative pressure on the ink line and damper and likely collapsing the ink line in places. You need to learn a bit about your printer before you damage something. Do a search on here, there are a lot of threads going over exactly what you are experiencing and doing. Ink fills and cleaning cycles are generally the least effective at getting ink flowing through a head again. A nozzle soak usually works best for that.
 

coreprint

New Member
Good advice, I will look through the forum some more..
ok, does anybody know how to open the valveson the JV33?
 

Vinylman

New Member
Good advice, I will look through the forum some more..
ok, does anybody know how to open the valveson the JV33?

The basic way to get the valves open is as follows:

Restart your machine while holding down the FUNCTION & REMOTE buttons and start the machine by pushing the green button on the lower front panel.

Once machine starts initialization process, release the two buttons and let the machine start up.
After machine goes through its start up proceedure, you can access the service menu by pushing the "FUNCTION" key till you see "#TEST" press "ENTER"
use the DOWN ARROW and scroll till you see "INK CART.", "press ENTER"

use the DOWN ARROW and scroll till you see "CART. VALVE" press "ENTER"

You will see 8 dots that represent the ink cartridge valves. Using the arrow keys, push the UP ARROW to open a valve, then push the right arrow to move to the next valve, and repeat until all valves are open.
Then you can proceed to use a syringe to GENTLY GENTLY pull vacuum on the inks hopefully drawing ink down to you waste station, and re-leaving your problem.
 

Vinylman

New Member
Here is a copy of my answer to this problem from a former thread. It should help you solve your problem. You should follow the link and get a copy of the SERVICE MANUAL.

Hope this helps!!

http://microasu.com/download/mimaki/ICCprofiles/JV33/JV33 Maintenance Manual D500346_Ver.1.10.pdf


I do a standard head clean FIRST, then check your test pattern.

If no change then I go into service mode, open the ink servos via the key pad prompts, CAREFULLY, remove one of the small drain hoses below the docking station, clamp off the other hose to create a vacuum. Then hook the removed line {MAKE SURE YOU DON'T PULL THESE LIES OFF THE BOTTOM OF THE DOCKING STATION> They should be pulled apart where they attach to the pump.} to a medium size syringe, and GENTLY draw back on the plunger of the syringe. It will create a vacuum, and pull ink through the print head all the way from the ink carts.

Once you are sure you have pulled ink through the docking station, remove the syringe, re attach the line below the docking station, CLOSE all solenoids at ink carts, and run another test draw. Should show positive results.

Another thing you might do is a LONG soak of the print head on the docking station filled with cleaning solution.

Do a search here on this site. "Artbot" uploaded a complete service manual for our printer, and it is invaluable.


P.S. You need to be familiar with these printers BEFORE you start tearing into them , BUT they are pretty basic once you get the basics in your head.

Best of luck.
 

bloobird0

New Member
The basic way to get the valves open is as follows:

Restart your machine while holding down the FUNCTION & REMOTE buttons and start the machine by pushing the green button on the lower front panel.

Once machine starts initialization process, release the two buttons and let the machine start up.
After machine goes through its start up proceedure, you can access the service menu by pushing the "FUNCTION" key till you see "#TEST" press "ENTER"
use the DOWN ARROW and scroll till you see "INK CART.", "press ENTER"

use the DOWN ARROW and scroll till you see "CART. VALVE" press "ENTER"

You will see 8 dots that represent the ink cartridge valves. Using the arrow keys, push the UP ARROW to open a valve, then push the right arrow to move to the next valve, and repeat until all valves are open.
Then you can proceed to use a syringe to GENTLY GENTLY pull vacuum on the inks hopefully drawing ink down to you waste station, and re-leaving your problem.

I've been told that the valves on the mimakis can also be opened without going into the service menu, by doing something manually behind the cartdriges (then the printer does not not to be powered on). Do you know how?
 

Vinylman

New Member
I've been told that the valves on the mimakis can also be opened without going into the service menu, by doing something manually behind the cartdriges (then the printer does not not to be powered on). Do you know how?

Because the valves seem to be opened and closed by electric solenoids I am not personally familiar with any other way of opening these valves. I will check through my service manual to see if there is a way.
From what I can get from the service manual, the only thing you should do behind the ink cartridge cover is IF you are changing from dual 4 color to some other ink configuration.

There are manual connectors that generally NOT in need of changing once machine is installed and properly adjusted.
The ONLY reason I would mess with these is if you are having an air leak situation. And even then I would be VERY CAUTIOUS.
 

bloobird0

New Member
the last time I met my mimaki Tech, he told me this (valve can be manually openend) so I think it should not be risky but I did not ask him how.
 

SightLine

║▌║█║▌│║▌║▌█
It is actually pretty easy to open them manually and causes no problems with the machine. Just remove the cover on the back of the cartridge station. The attached shows inside the cover. The yellow circle shows the complete solenoid and valve, when activated the solenoid pulls the pin that is connected to the white plastic lever which opens the cartridge valve. Just push in on the red circled part to manually open it. You can even temporarily put a piece of tape across it to hold it open - the solenoids are spring loaded to keep the valves closed when the solenoid is not active. Also attached a closeup shot of one of the solenoids and valves where you can more clearly see the action of the solenoid on top where when it pulls the pin in (circled in red - also where you push in to manually open the valve), the white plastic lever causes the valve underneath to pull out opening the ink flow to the cartridge.

You can also see the "H" connections on the ink lines which are required on machines running 4 color (dual CMYK). If you machine is configured for 6 color or with white or silver inks then you would not have the short cross connectors between the pairs of lines.
 

Attachments

  • IMG_1361.jpg
    IMG_1361.jpg
    80.8 KB · Views: 276
  • IMG_1361a.jpg
    IMG_1361a.jpg
    102 KB · Views: 301

MikePro

New Member
cool seeing that photo. I'm a JV3, but have always curious how the continuous ink supply worked on the new models... basically just a bridge between the two lines and both lines just draw off whichever cartridge's valve is open.
....also meaning that if you try to draw from a damper with a syringe, especially against closed valves, you're actually pulling backwards against the attached channel. which is no good. syringes should be a last-resort anyways, as it could open a whole-new can of worms if ink drips find their way into delicate places.

my $'s on either a bad ink pump or a bad seal with the capping station.
 

coreprint

New Member
We still have problems..
I have tried replacing the cap top..

Is there anything we need to do after replacing this.

As now, no ink is coming out!!!

heeelp.

:smile:
 
Top