Stacy,
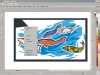
Here's an issue I see frequently in all versions of Corel Draw and it seems to have carried over into X3, when you export your image as a bitmap, a thin border or transition (one pixel in thickness by default, larger if you change the default settings) has been added in the final image.
Here's how I deal with the problem in one of two ways:
1. Open the image in Corel PhotoPaint and crop the image by one pixel on all four sides. This is the best solution if the outer edge has multiple colors.
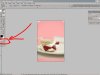
2. If the image has a single color outer edge, prior to exporting the image, simply change the background color to match your border, the resulting export will give you the desired results.
The border is a result of the export process using an algorithm that averages the color of the outer edge of your image with the immediate background color. Which algorithm is used depends upon your selection of variables in the export dialogue boxes, the more smoothing you choose, the wider the "buffer" you will get. If the background is black, the border will be shades of gray. If you create images for the web, this is a handy feature as you can set your background color to match your website's background and the exported images will blend neatly with your webpage.
 :
: